목차
틱택토 게임 만들기
25.02.03
게임 구조 설계
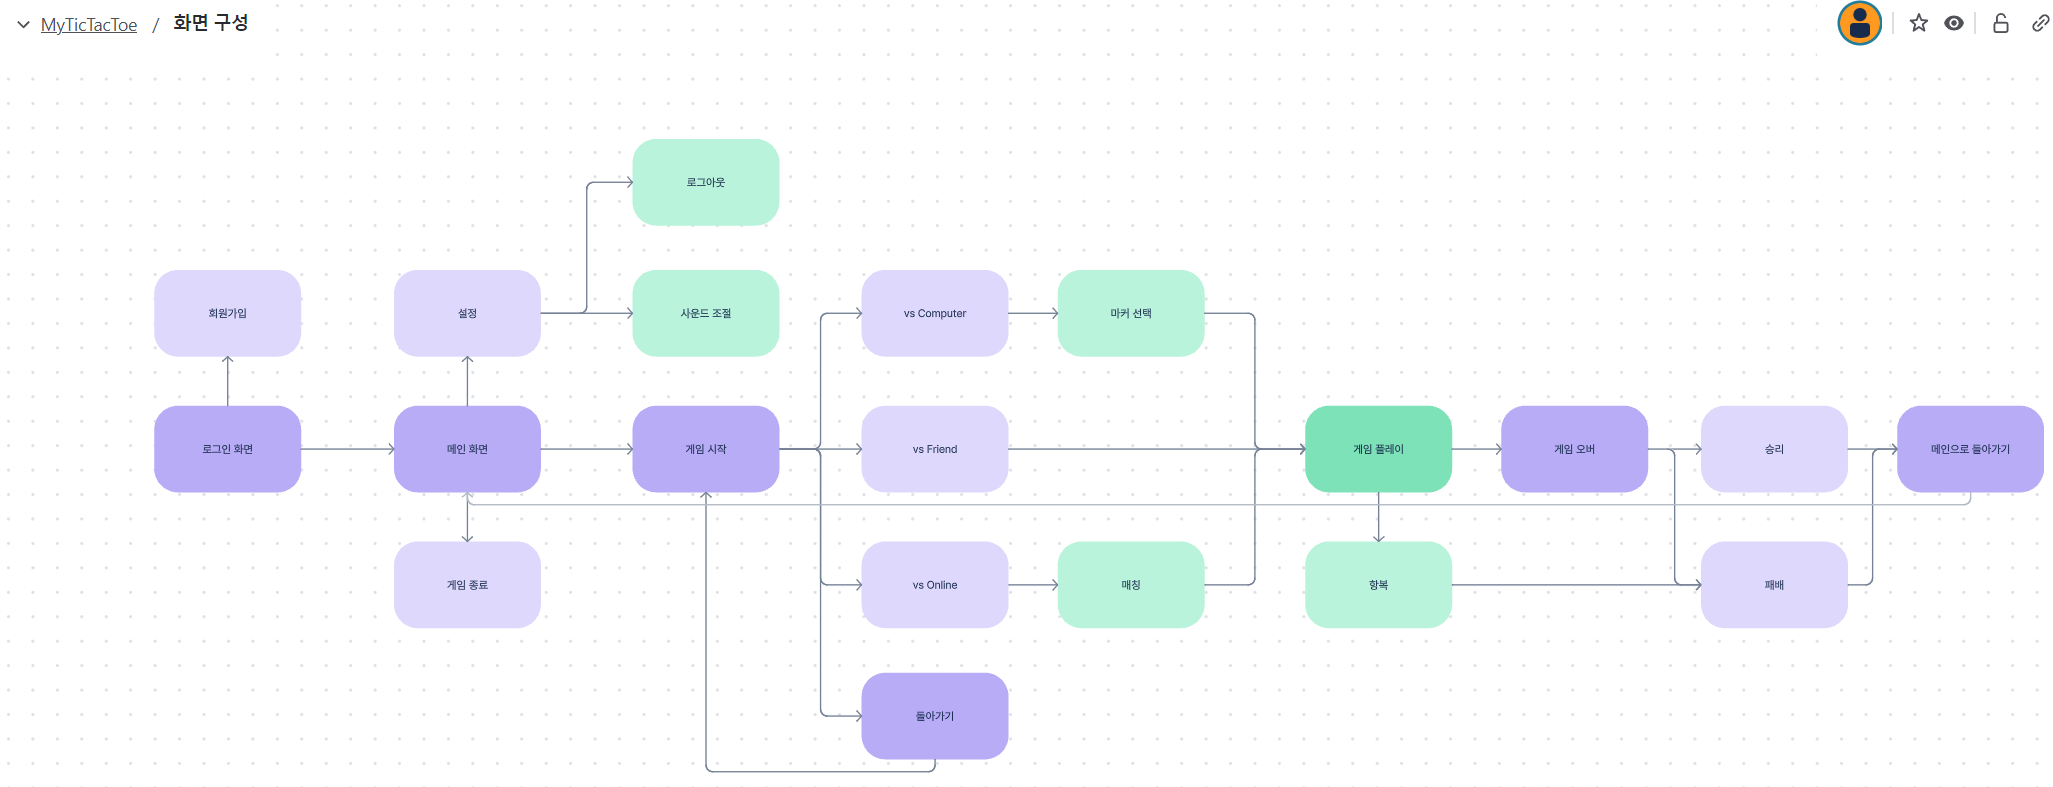
--> 내가 그려본 구성
UI Scene
└ Popup UI 생성
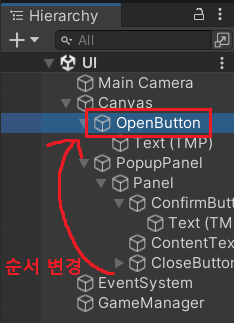
1. Canvas 추가
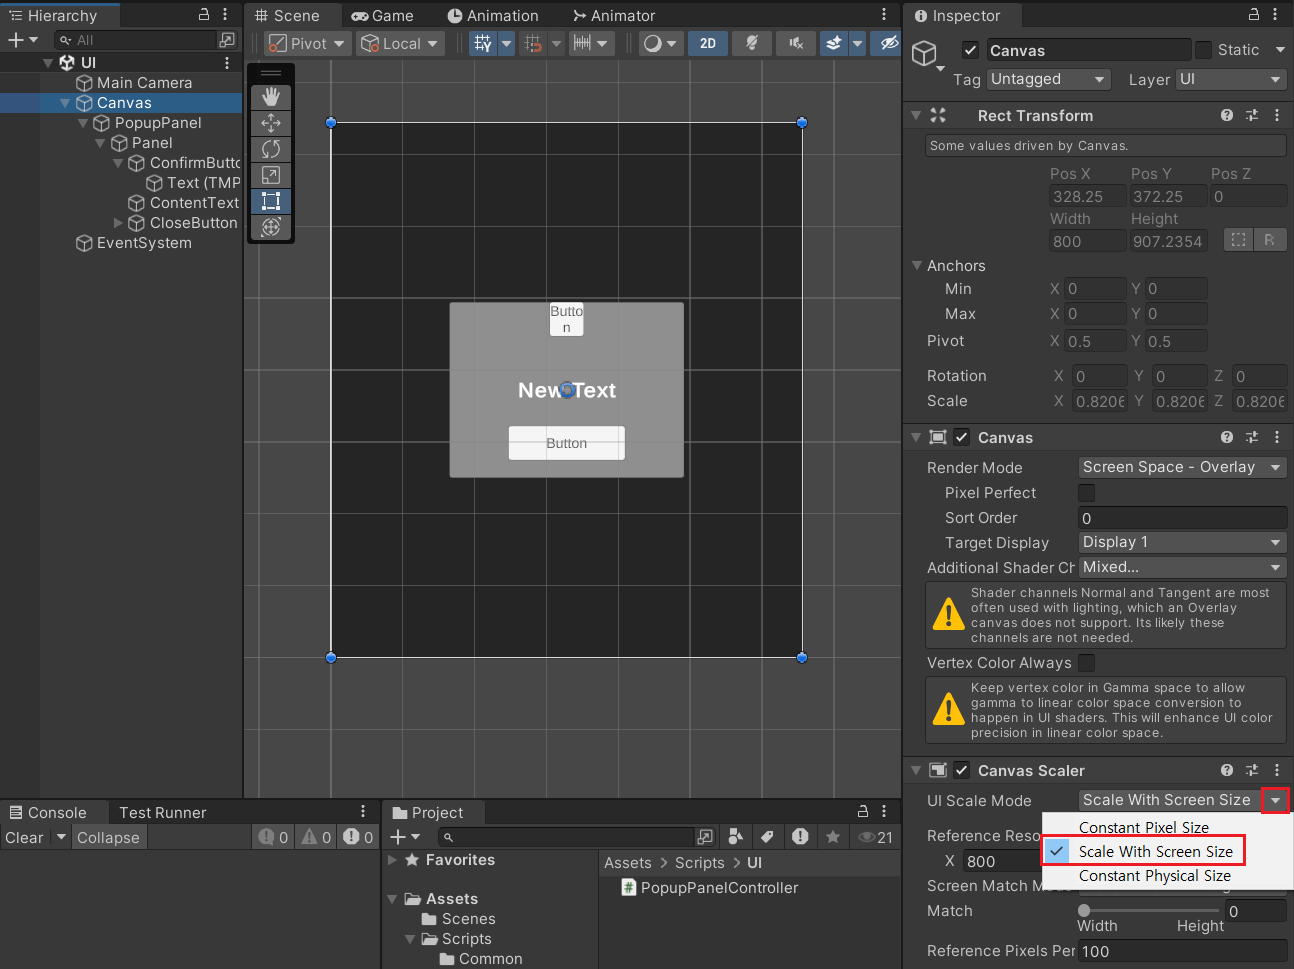
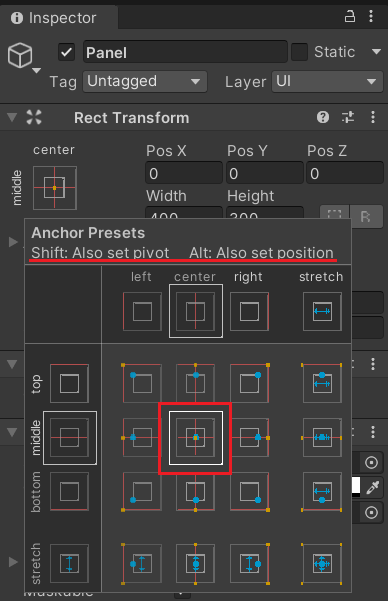
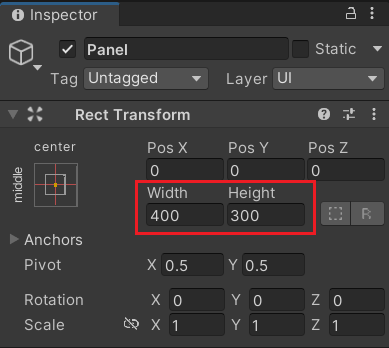
2. Panel 추가
>> PopupPanel


>> Panel
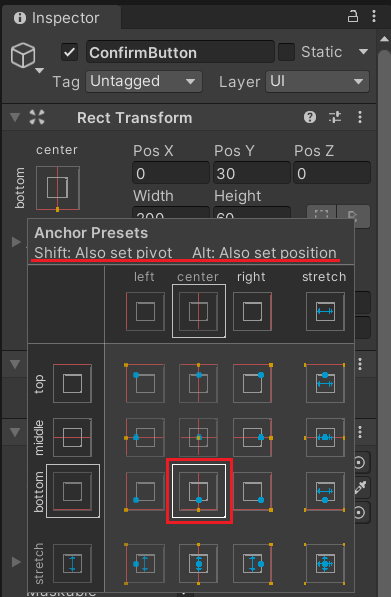
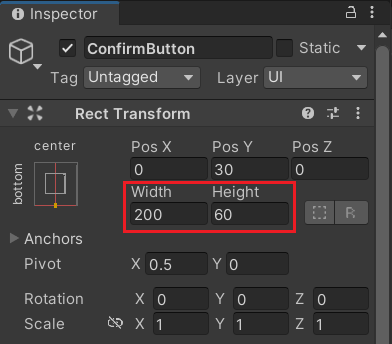
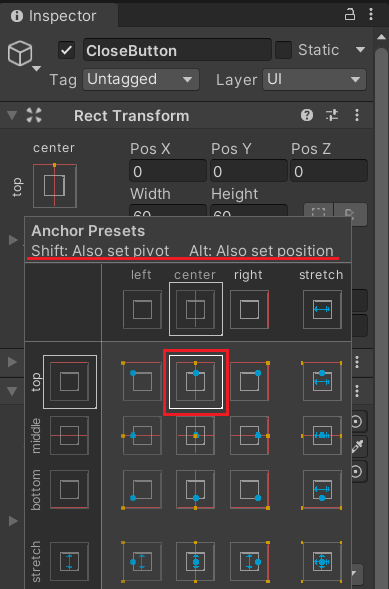
3. Button 추가
>> ConfirmButton
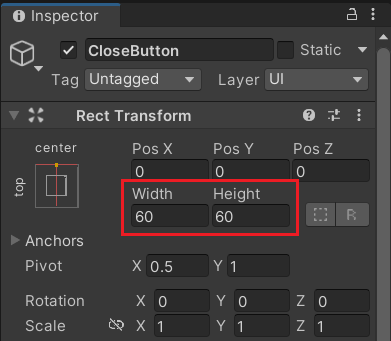
>> CloseButton
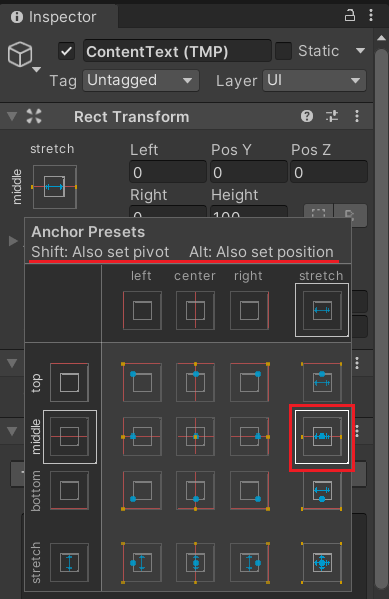
4. Text 추가

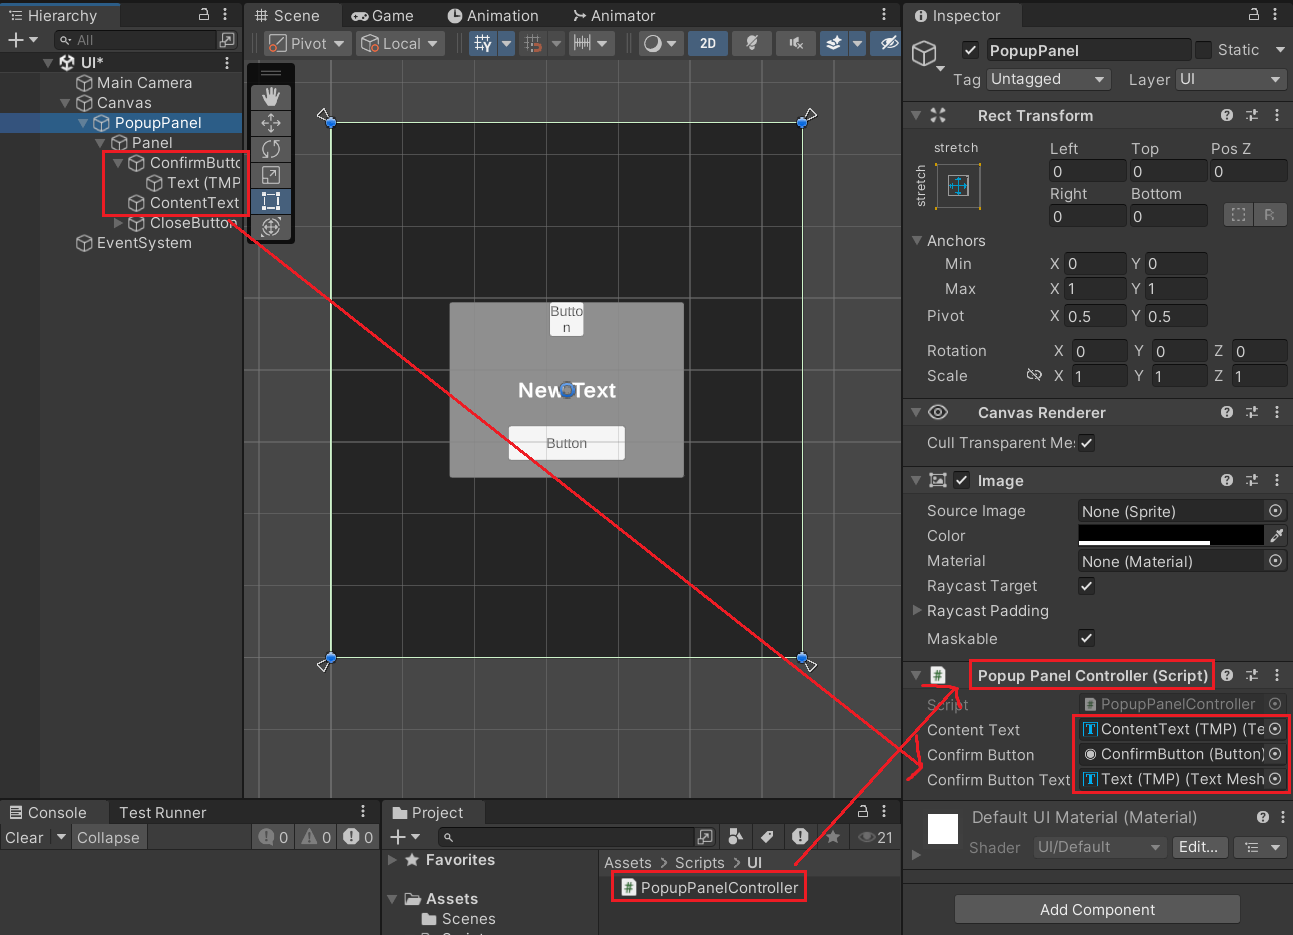
5. PopupPanel에 PopupPanelController.cs 추가 및 바인딩
6. GameManager 추가
: TestGameManager.cs 추가

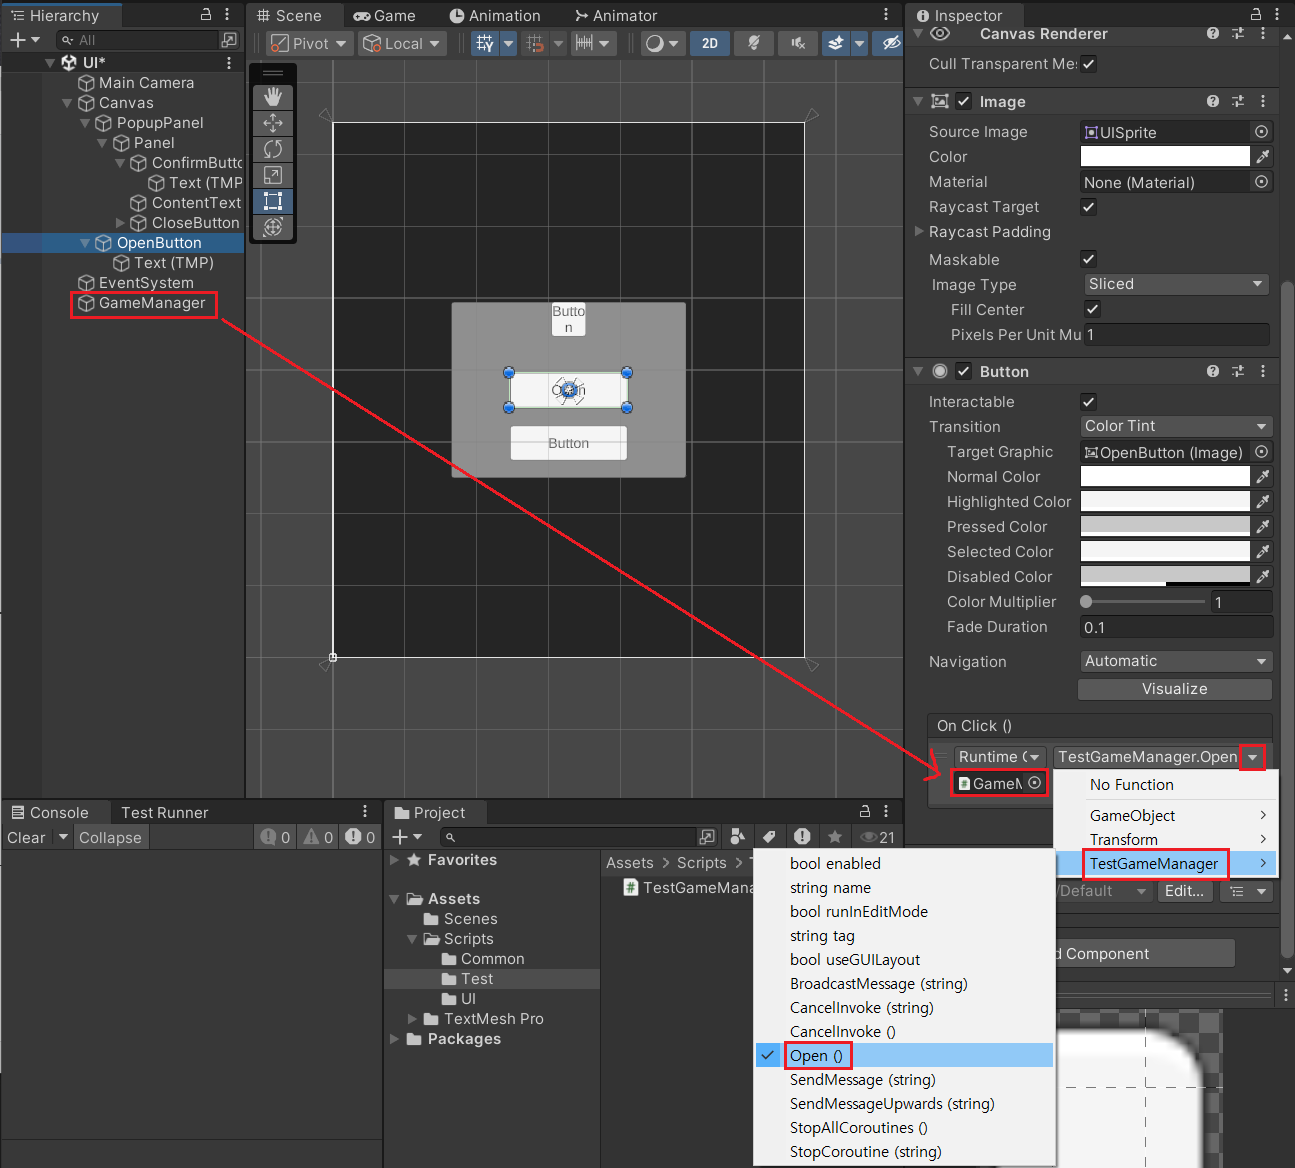
7. OpenButton 추가
: OnClick()에 GameManager 바인딩해서 Open() 함수 추가
※ 순서 변경
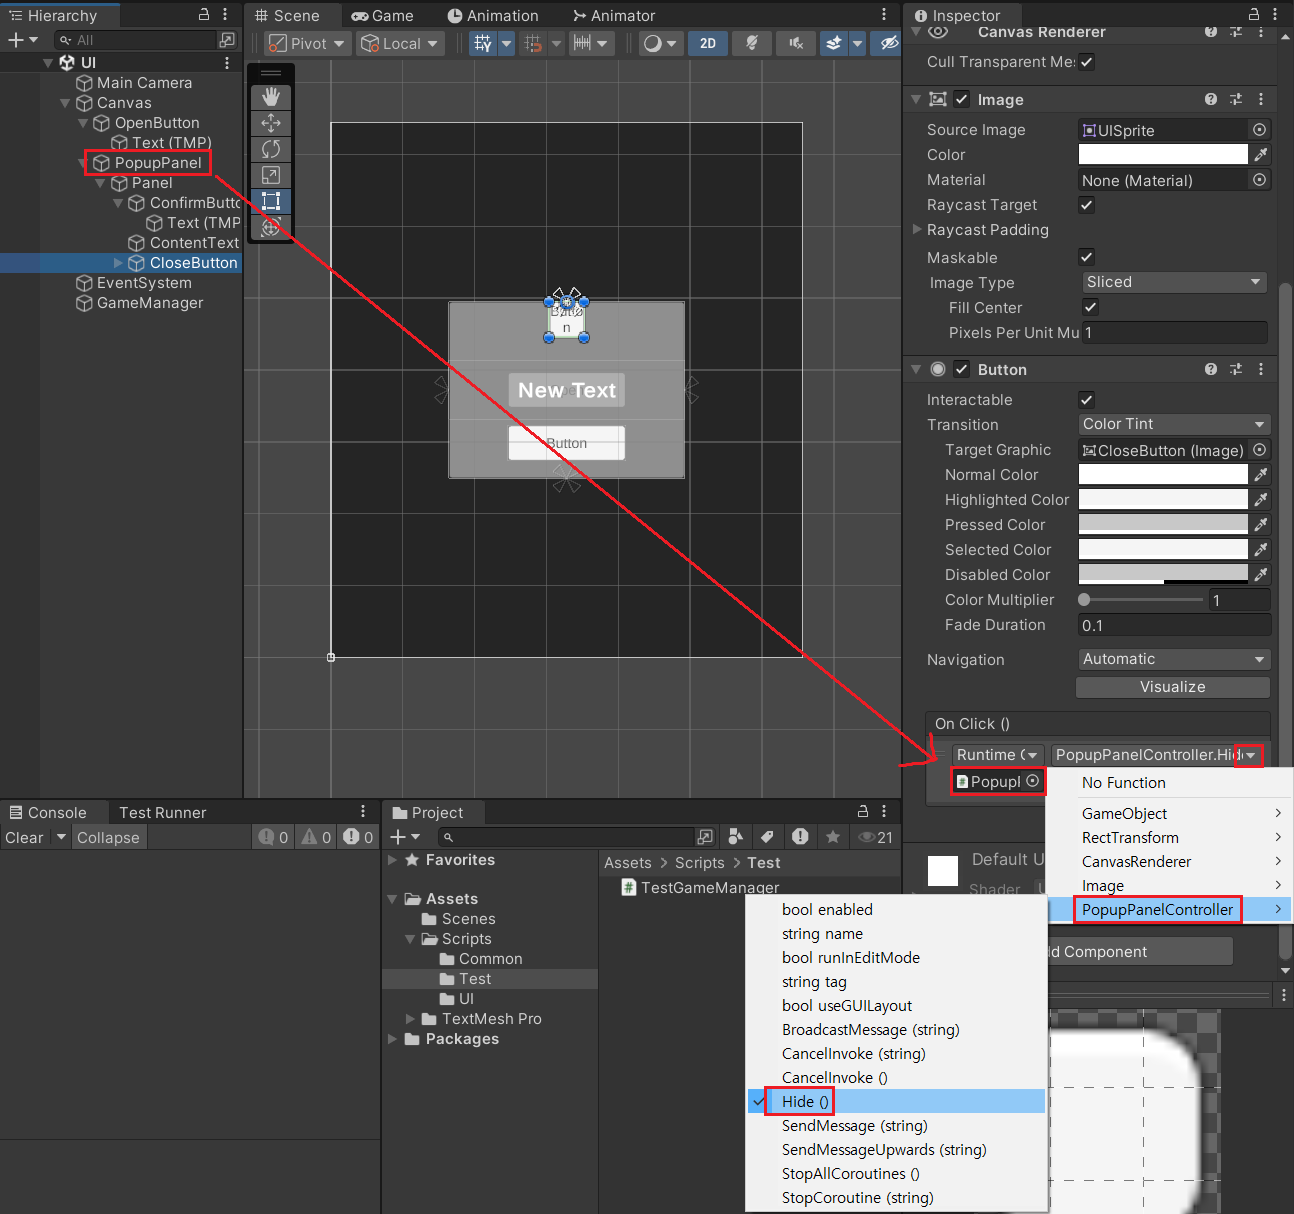
8. CloseButton에 OnClick() 바인딩
: PopupPanel 바인딩해서 Hide() 함수 추가
└ DOTween을 활용하여 UI에 Animation을 추가해보기
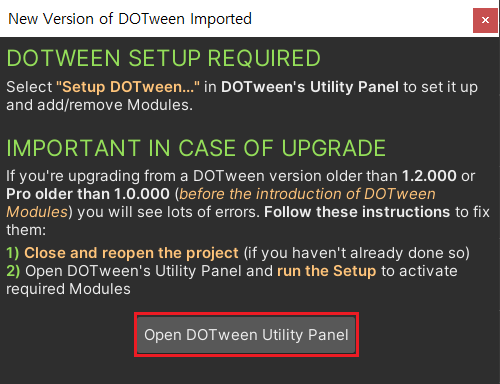
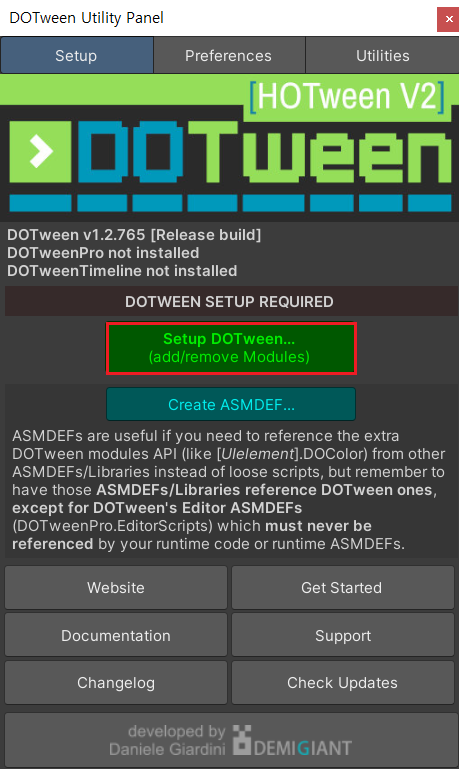
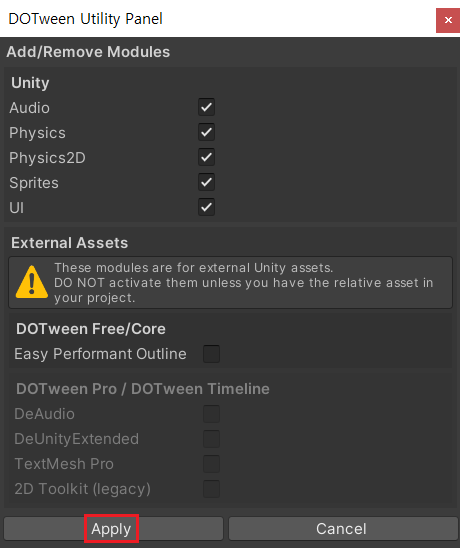
설치하기
https://assetstore.unity.com/packages/tools/animation/dotween-hotween-v2-27676
DOTween (HOTween v2) | 애니메이션 도구 | Unity Asset Store
Use the DOTween (HOTween v2) tool from Demigiant on your next project. Find this & more animation tools on the Unity Asset Store.
assetstore.unity.com
코드 작성
: 아래의 PopupPanelController.cs 참고
>> 그룹화 및 코드로 Panel의 위치를 받아서 Animation을 추가하기 위해 바인딩
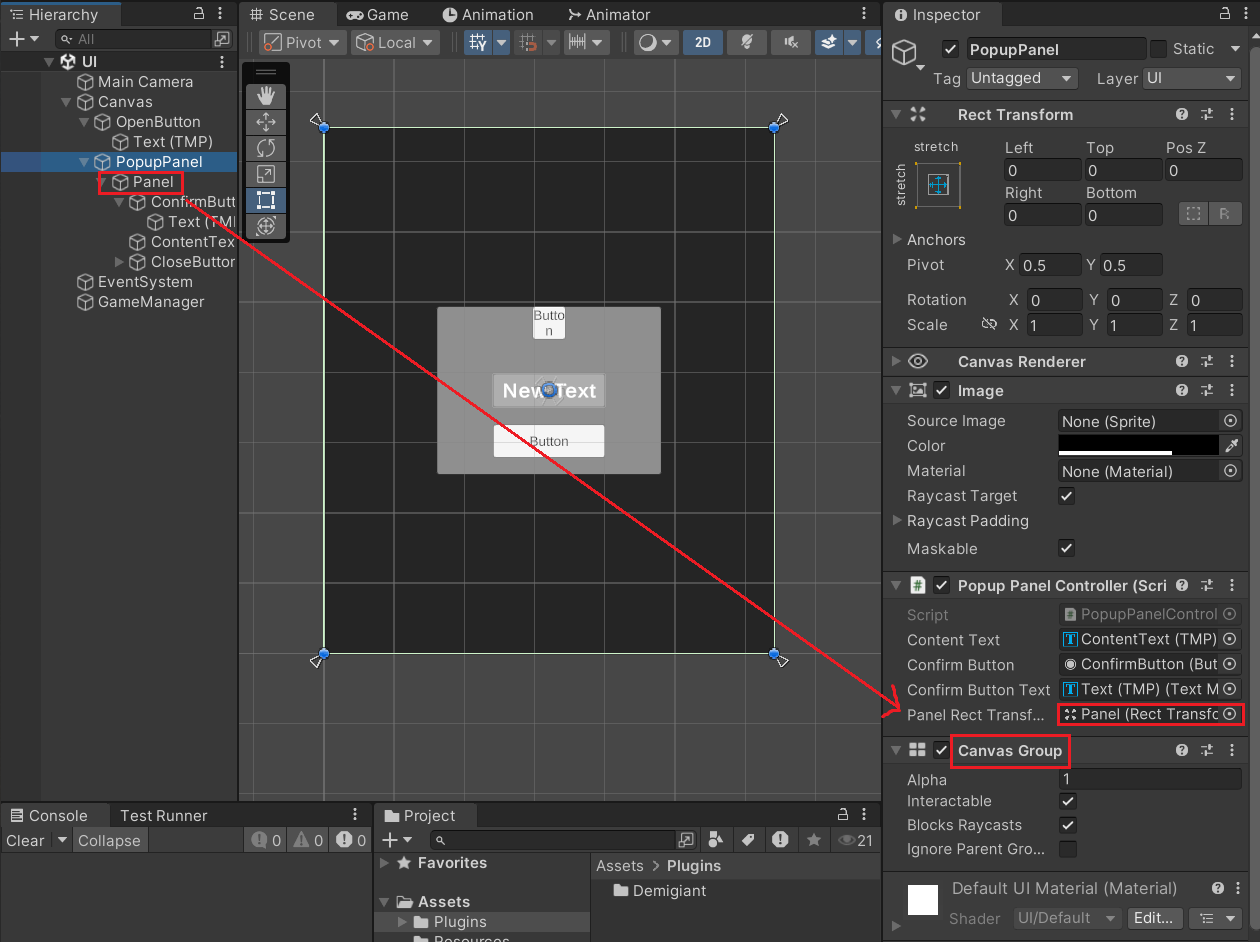
--> Panel 바인딩
└ 코드 작성
- Singleton.cs
- PopupPanelController.cs
- TestGameManager.cs
>> Singleton.cs
using System;
using System.Collections;
using System.Collections.Generic;
using UnityEngine;

public class Singleton<T> : MonoBehaviour where T : Component
{
    private static T _instance;

    public static T Instance
    {
        get
        {
            if (_instance == null)
            {
                _instance = FindObjectOfType<T>();
                if (_instance == null)
                {
                    GameObject obj = new GameObject();
                    obj.name = typeof(T).Name;
                    _instance = obj.AddComponent<T>();
                }
            }

            return _instance;
        }
    }

    private void Awake()
    {
        if (_instance == null)
        {
            _instance = this as T;
            DontDestroyOnLoad(gameObject);
        }
        else
        {
            Destroy(gameObject);
        }
    }
}
>> PopupPanelController.cs
using System.Collections;
using System.Collections.Generic;
using System;
using TMPro;
using UnityEngine;
using UnityEngine.UI;
using DG.Tweening; // DOTween을 사용하기 위해 선언

[RequireComponent(typeof(CanvasGroup))]
public class PopupPanelController : Singleton<PopupPanelController>
{
    [SerializeField] private TMP_Text contentText;
    [SerializeField] private Button confirmButton;
    [SerializeField] private TMP_Text confirmButtonText;

    [SerializeField] private RectTransform panelRectTransform;

    private CanvasGroup _canvasGroup;

    private void Start()
    {
        _canvasGroup = GetComponent<CanvasGroup>();
        Hide(true);
    }

    public void Show(string content, string confirmButtonText, bool animation, Action confirmAction)
    {
        gameObject.SetActive(true);

        // animation을 위한 초기화
        _canvasGroup.alpha = 0;
        panelRectTransform.localScale = Vector3.zero;

        if (animation)
        {
            // DOTween 사용
            panelRectTransform.DOScale(1f, 0.2f);
            _canvasGroup.DOFade(1f, 0.2f).SetEase(Ease.OutBack);
            // SetEase() : animation을 빠르게 시작했다가 점차 느려지도록, / OutBack : 효과
        }
        else
        {
            panelRectTransform.localScale = Vector3.one;
            _canvasGroup.alpha = 1f;
        }

        contentText.text = content;
        this.confirmButtonText.text = confirmButtonText;
        confirmButton.onClick.AddListener(() =>
        {
            confirmAction();
            Hide(true);
        });
    }

    public void Hide(bool animation)
    {
        if (animation)
        {
            // OnComplete() : DOScale() 함수가 끝나고 난 뒤 실행
            panelRectTransform.DOScale(0f, 0.2f).OnComplete(() =>
            {
                contentText.text = "";
                confirmButtonText.text = "";
                confirmButton.onClick.RemoveAllListeners();

                gameObject.SetActive(false);
            });
            _canvasGroup.DOFade(0f, 0.2f).SetEase(Ease.InBack);
        }
        else
        {
            contentText.text = "";
            confirmButtonText.text = "";
            confirmButton.onClick.RemoveAllListeners();

            gameObject.SetActive(false);
        }
    }
}
>> TestGameManager.cs
using System.Collections;
using System.Collections.Generic;
using UnityEngine;

public class TestGameManager : MonoBehaviour
{
    public void Open()
    {
        PopupPanelController.Instance.Show("Hello", "OK", true, () =>
        {
            Debug.Log("OK 클릭!");
        });
    }
}
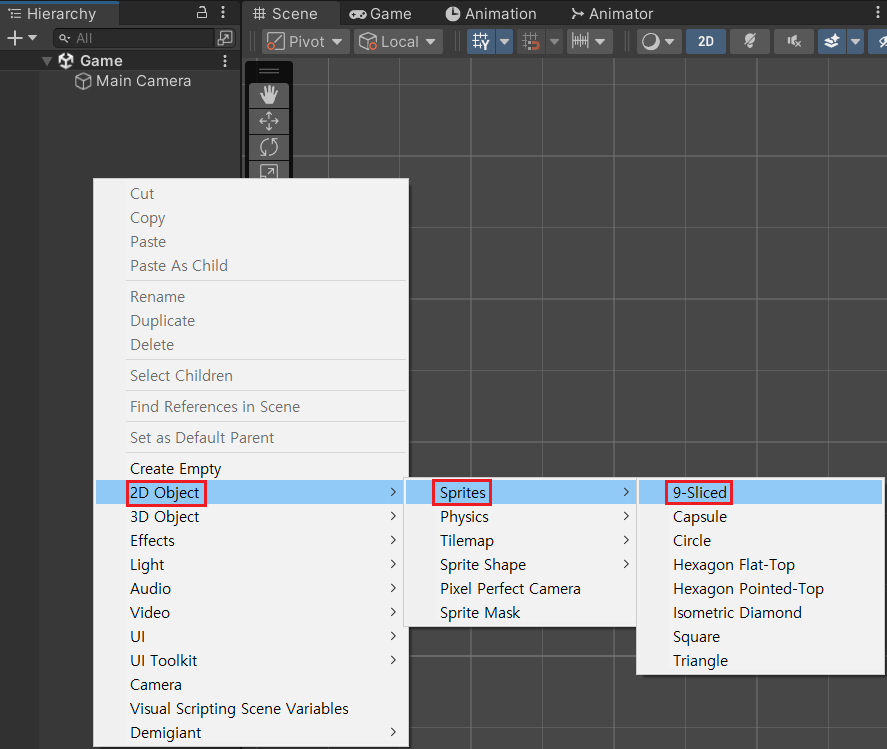
Game Scene
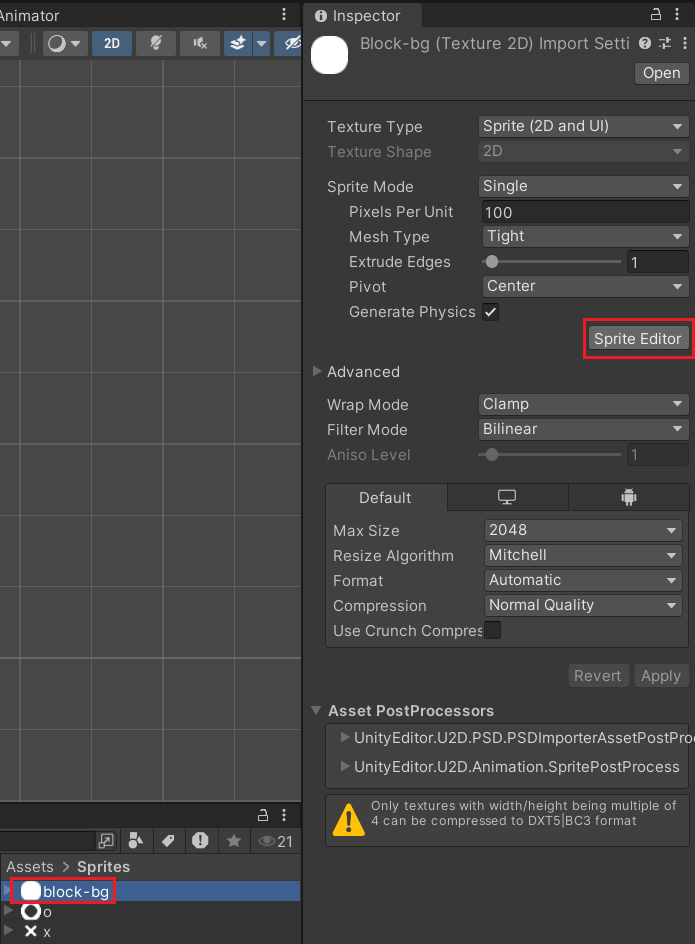
1. Sprite 추가
: Block 및 O,X
>> Block
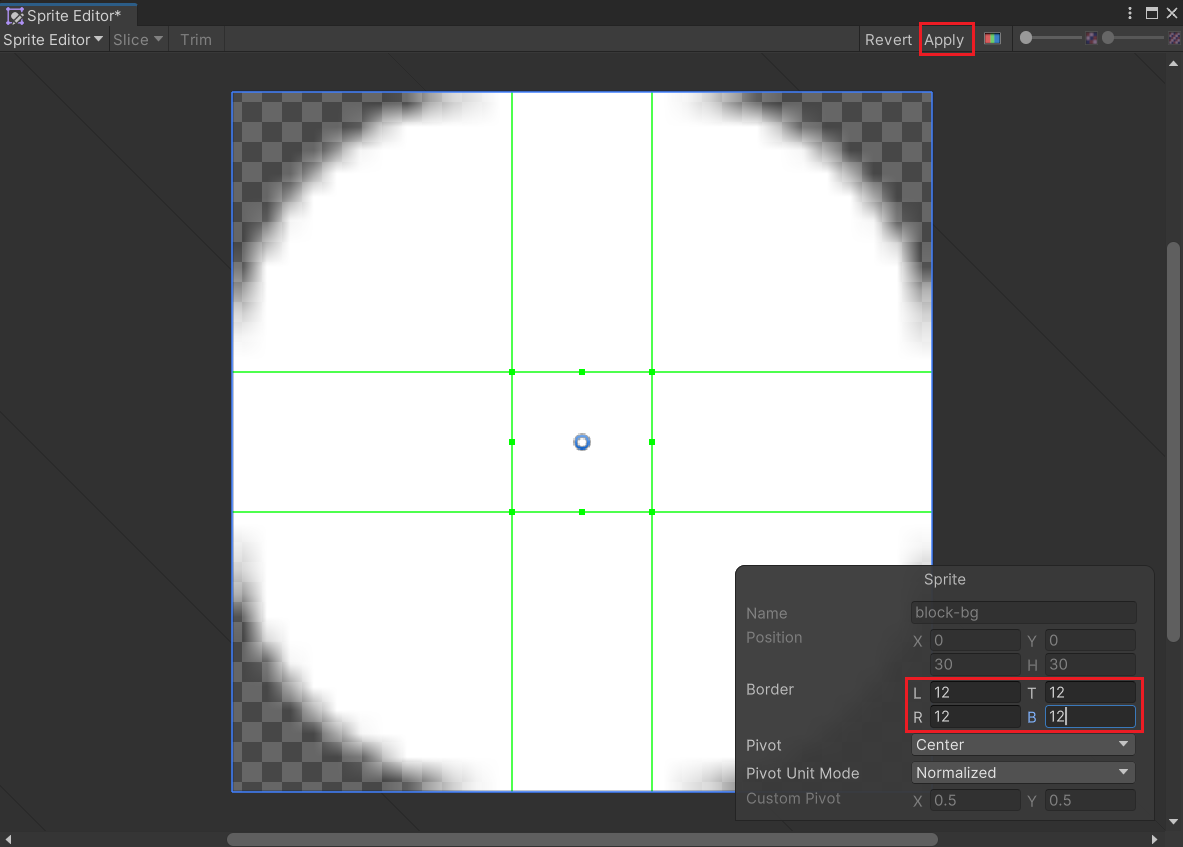
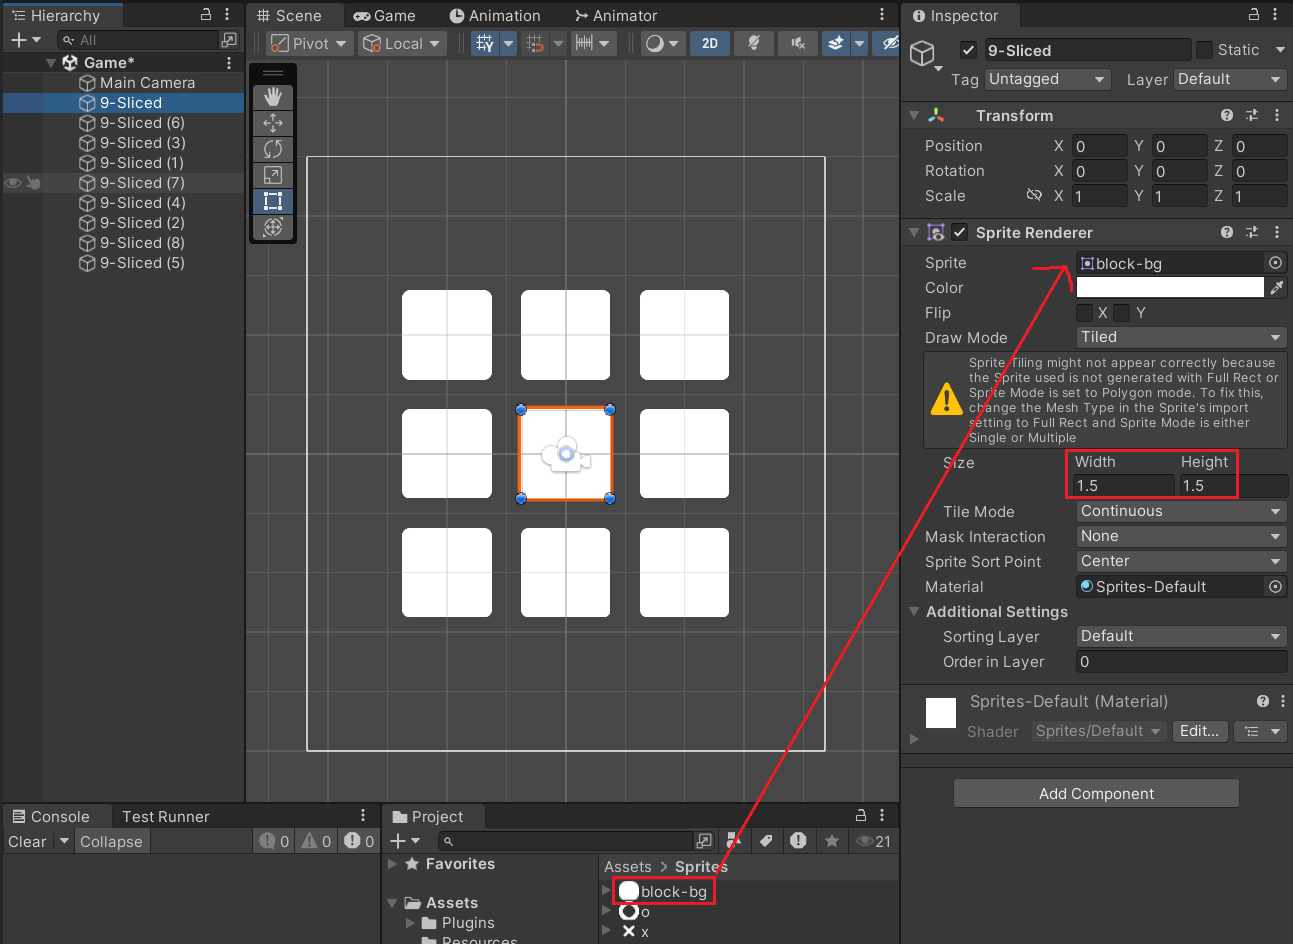
--> X : -2, 2 / Y : -2, 2 로 각각 배치
2. 화면 해상도 설정
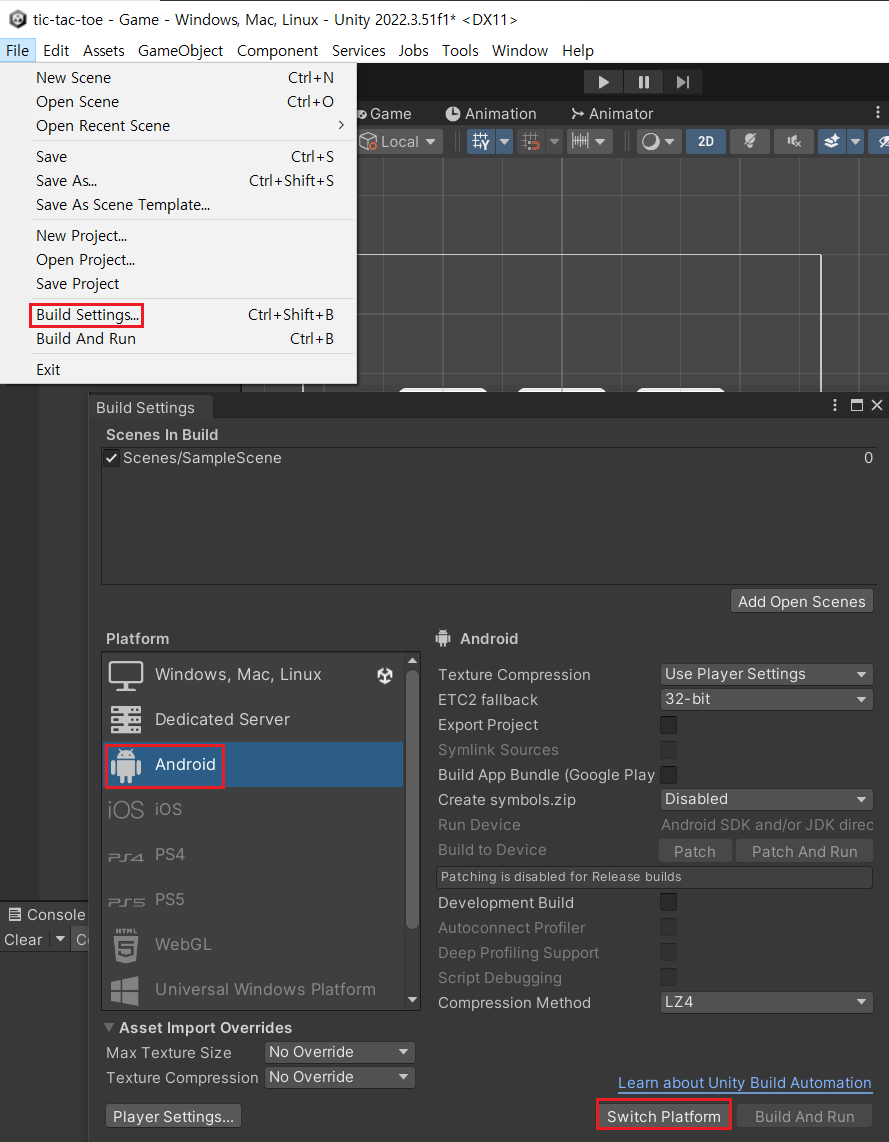
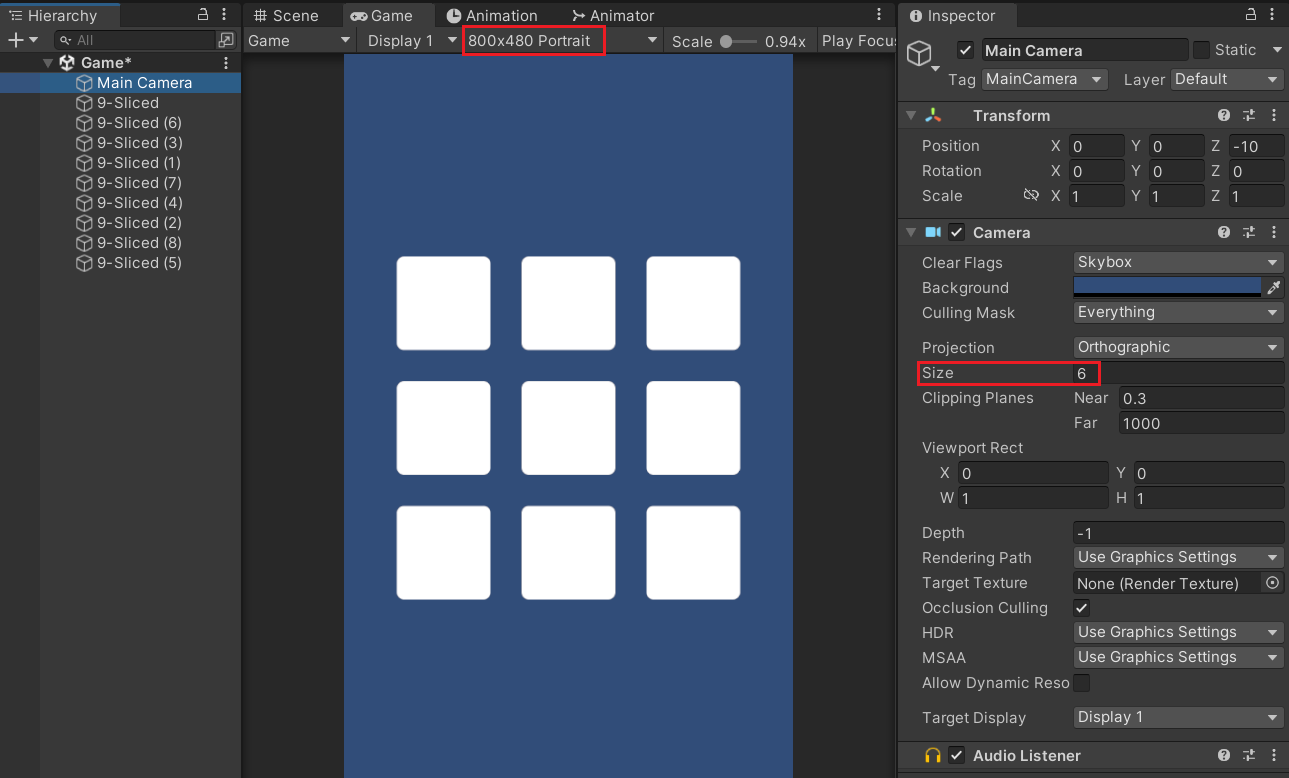
--> 실행할 때, 화면의 값을 통해 조정해줘야 한다.
C# 단기 교육 보강
1일차
형상 관리 프로그래밍과 활용
└ Git Bash
: 완전 코드 방식으로 진행 --> 직접적인 제어가 가능하기 때문에 에러 발생 시 해결하기가 좋다.
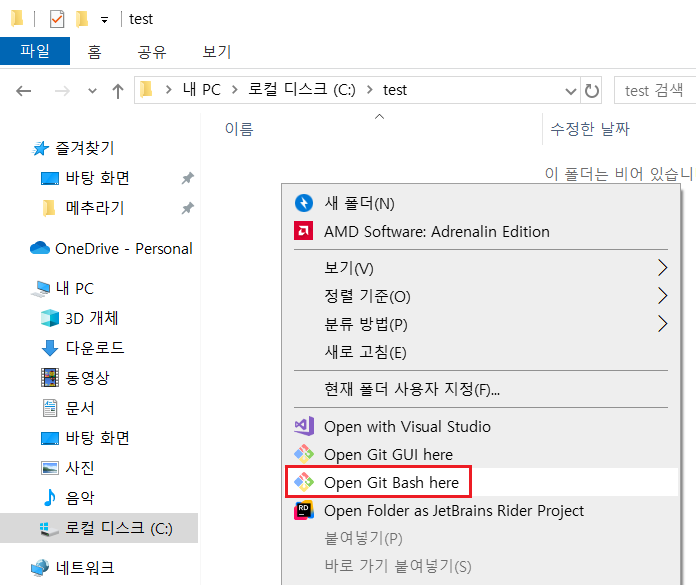
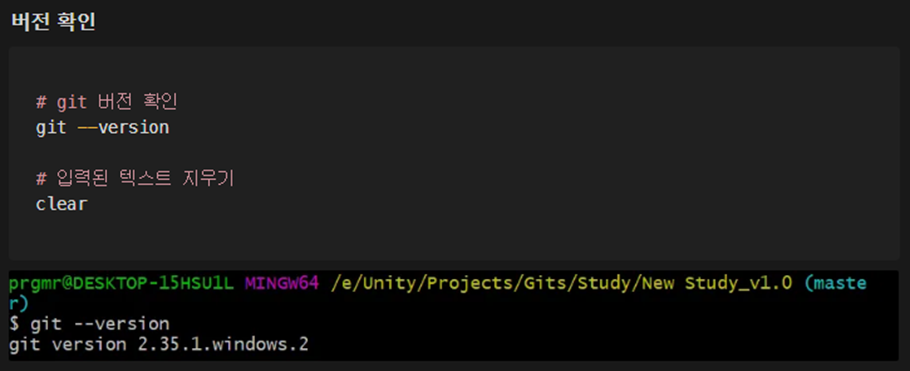
>> Git Bash 열기
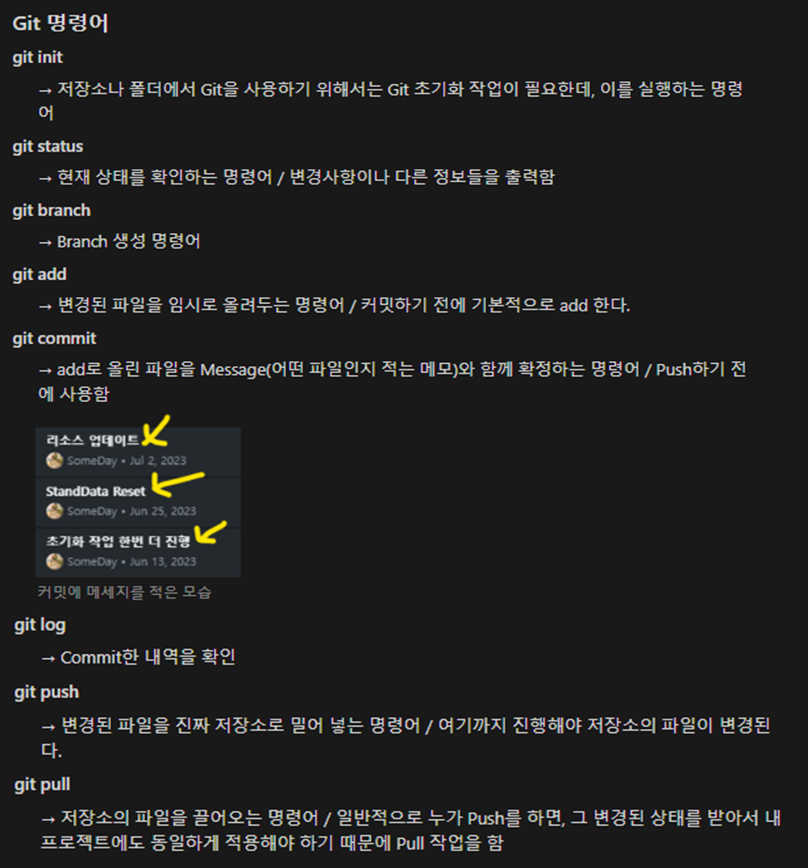
>> 명령어
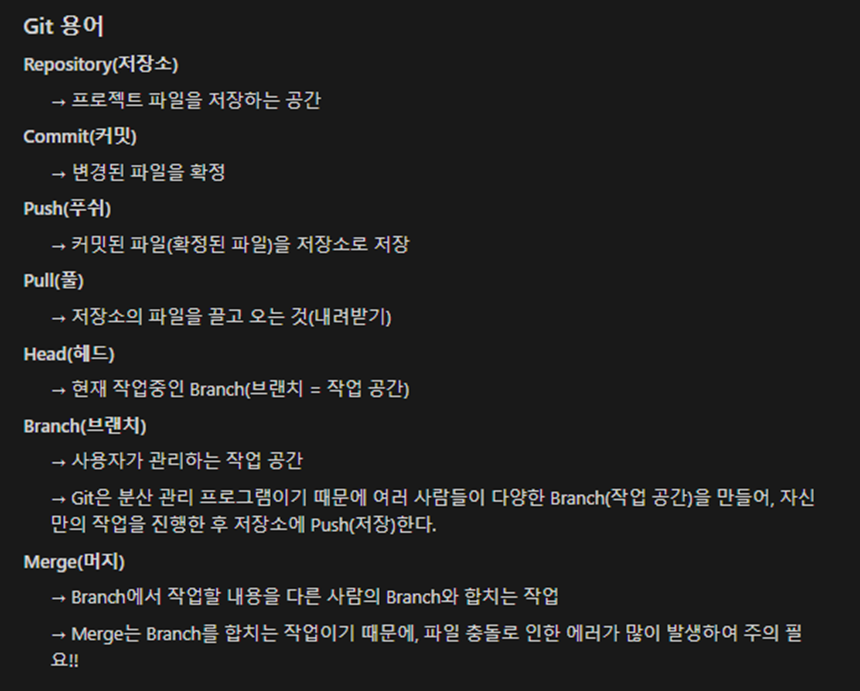
>> 용어

>> Git Bash 등록

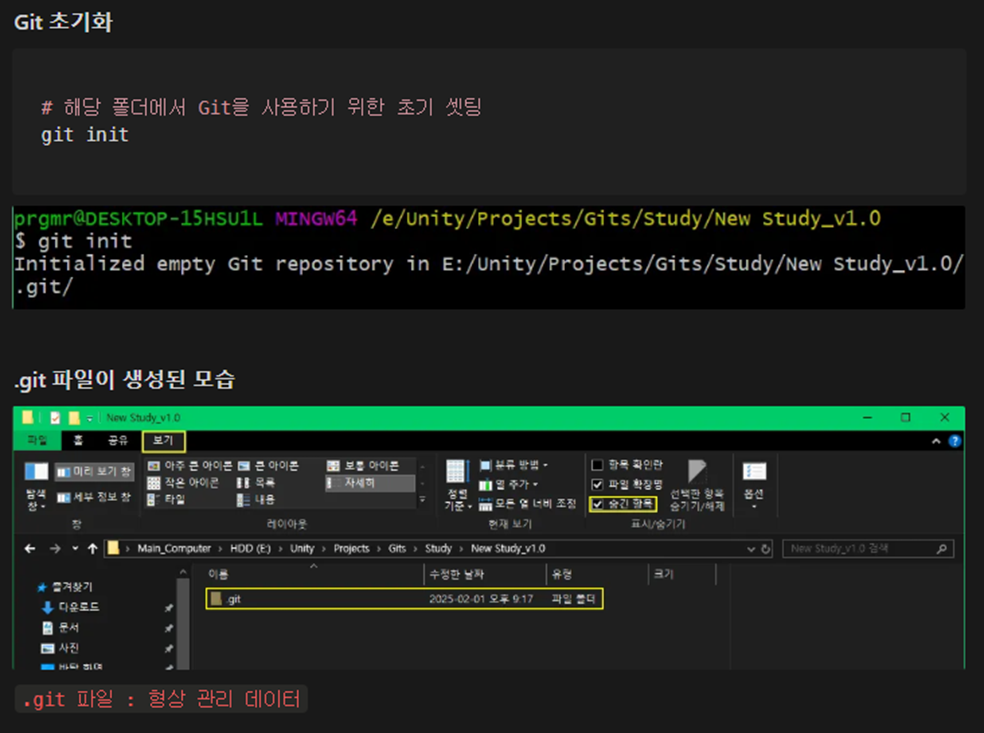
>> Git 초기 세팅
>> Git 상태 확인
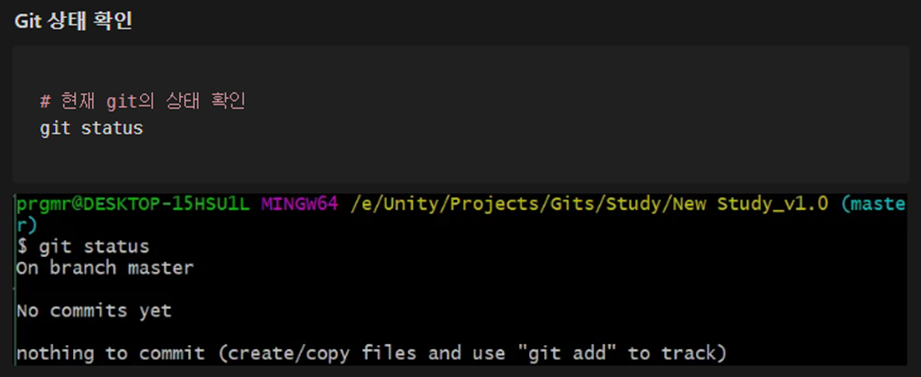
※ test.txt를 생성한 후 git status를 한 결과

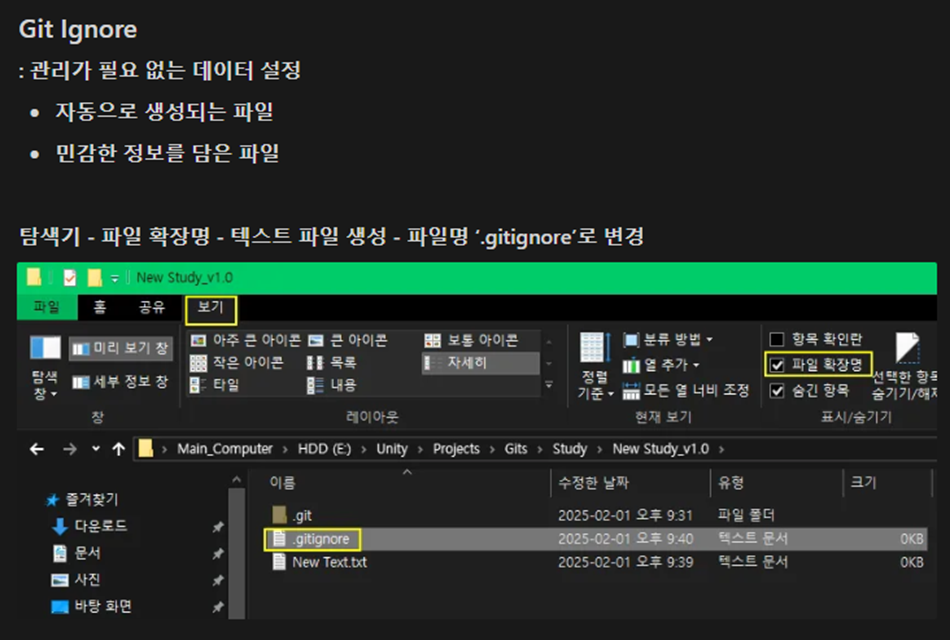
>> Git Ignore
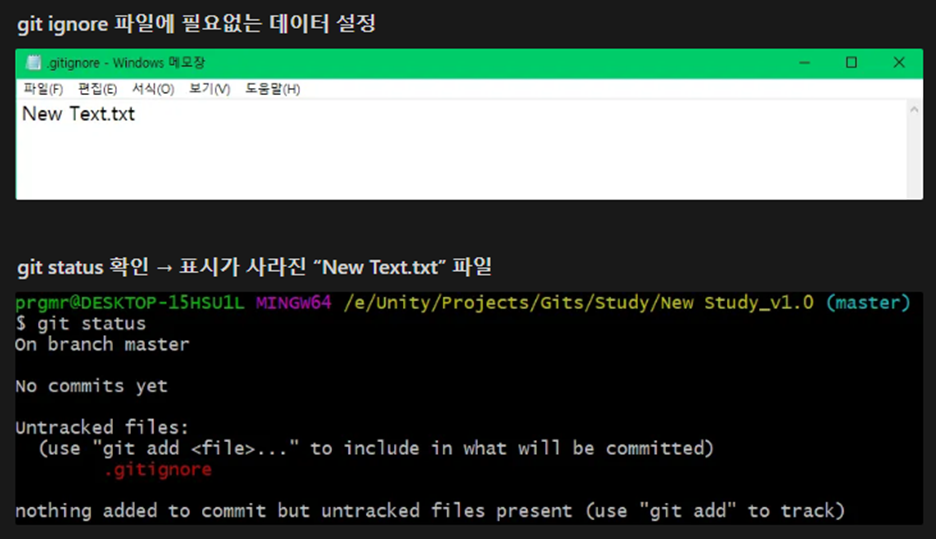
※ Git Ignore 예시
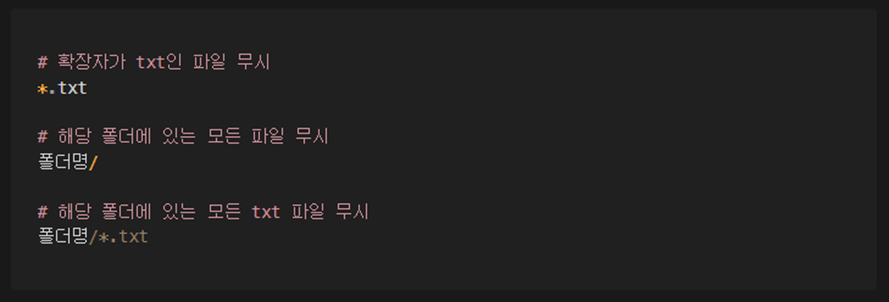
--> * 표시나 . 표시는 일반적으로 전부를 의미
※ Unity의 Git Ignore
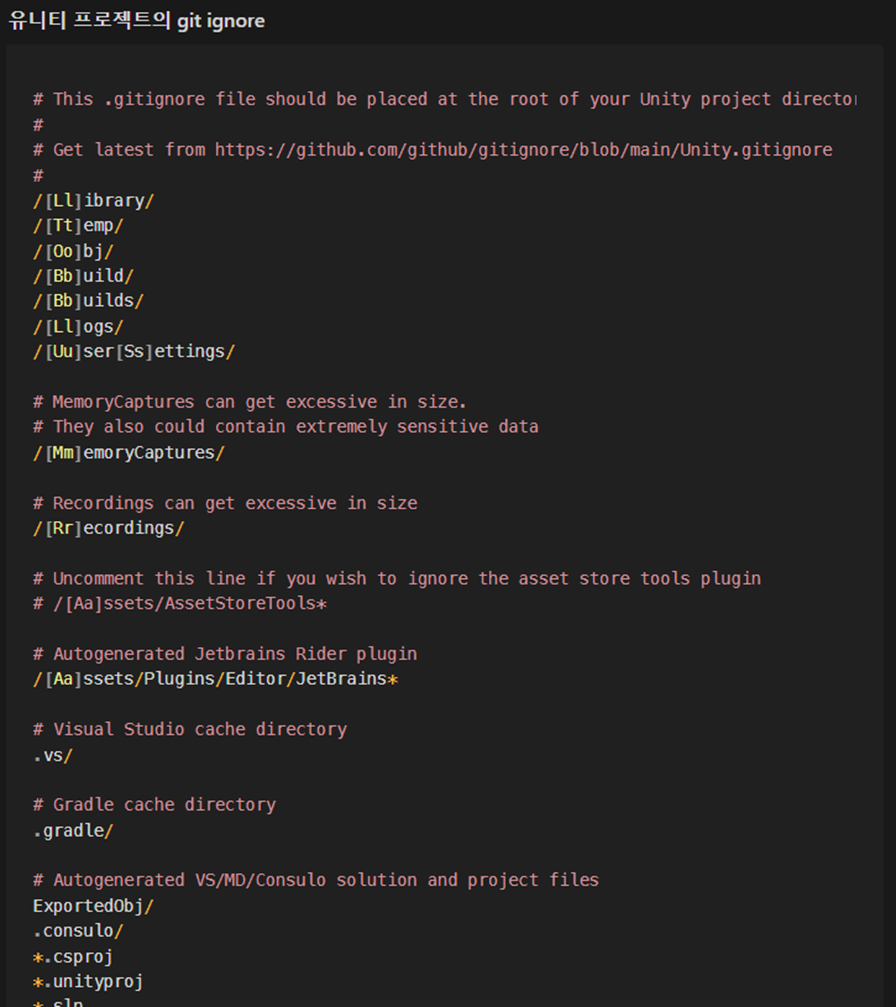
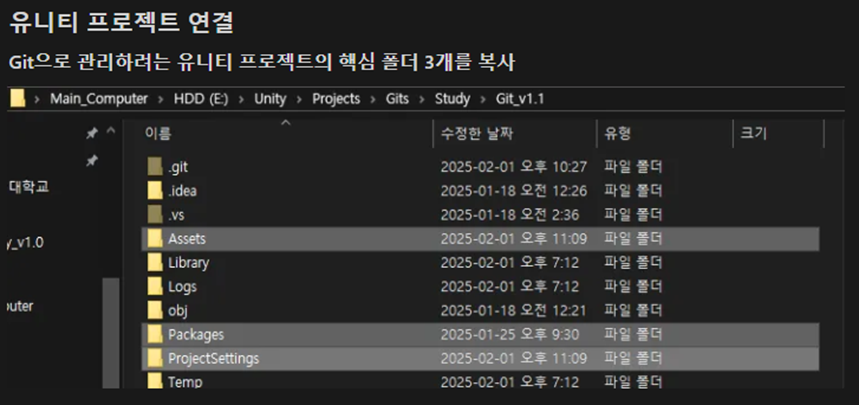
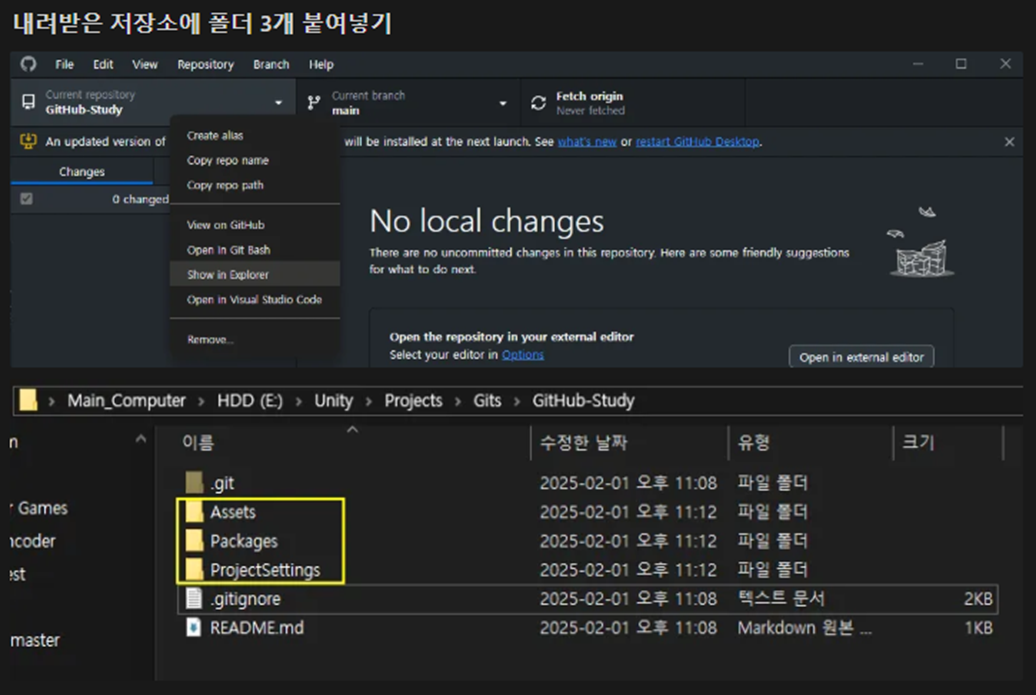
※ Unity Project의 핵심 폴더
- Assets
- Packages
- ProjectSettings
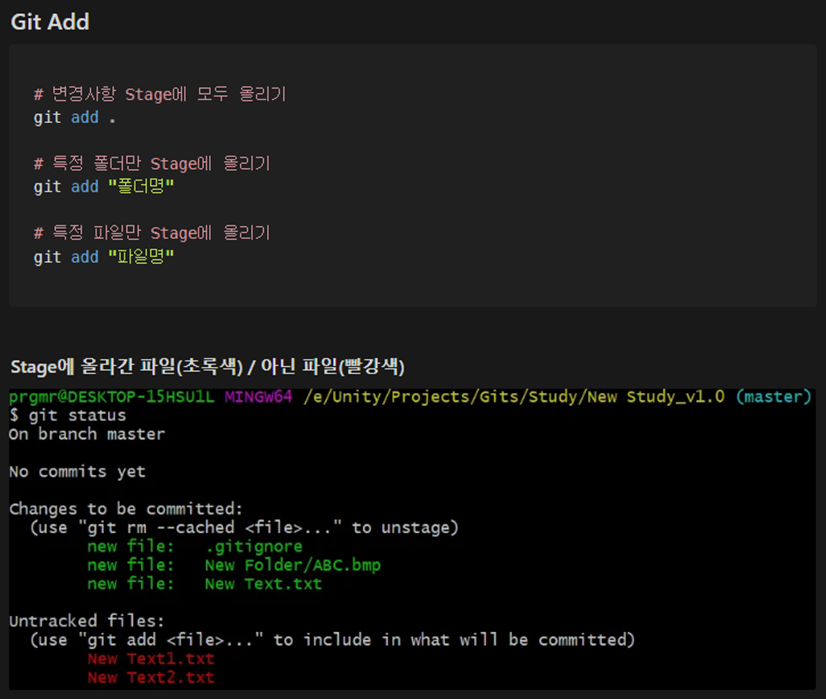
>> Git Add
: Stage는 임시 공간이라고 생각하면 된다.
>> Git Commit
: 내 컴퓨터에 있는 Local 저장소에 저장하는 것

--> 이후 Push하여 Server Repository에 올려야 함 (Server Repository example : GitHub)
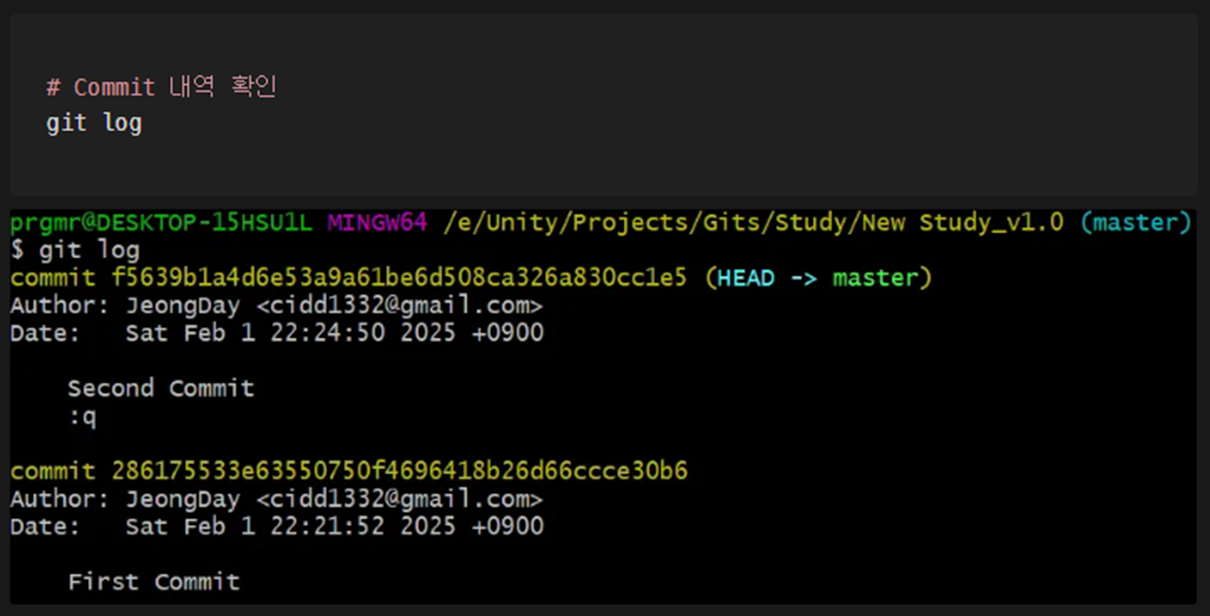
>> Git Log
※ Git Bash에서 복사 및 붙여넣기
- Ctrl + Insert : 복사
- Shift + Insert : 붙여넣기
└ GitHub & GitHub Desktop
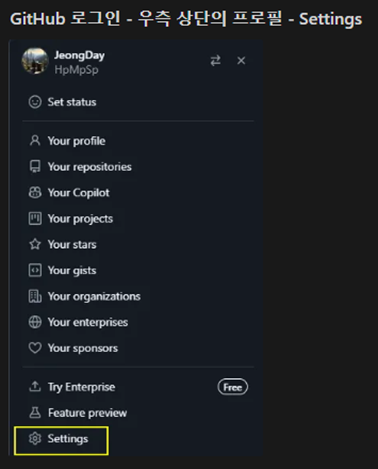
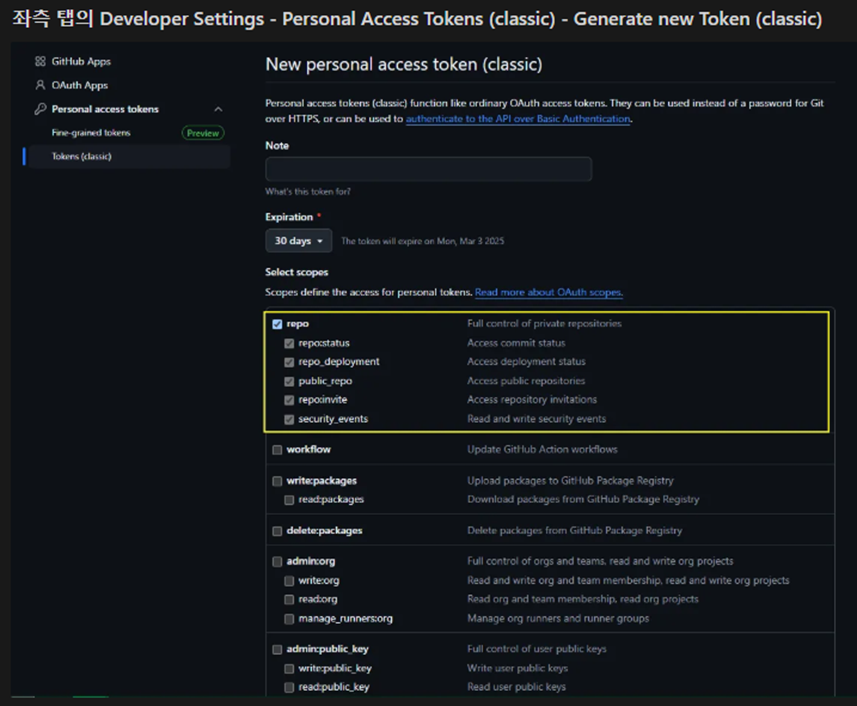
>> GitHub Token 생성
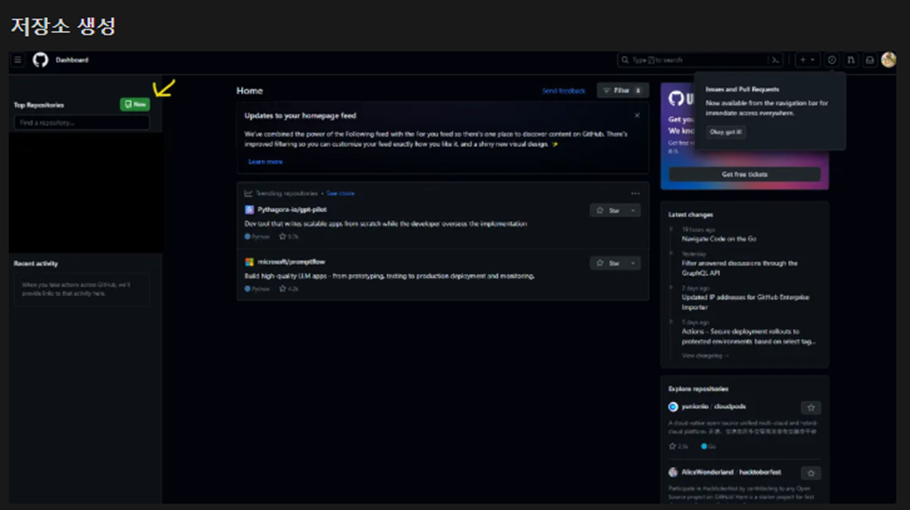
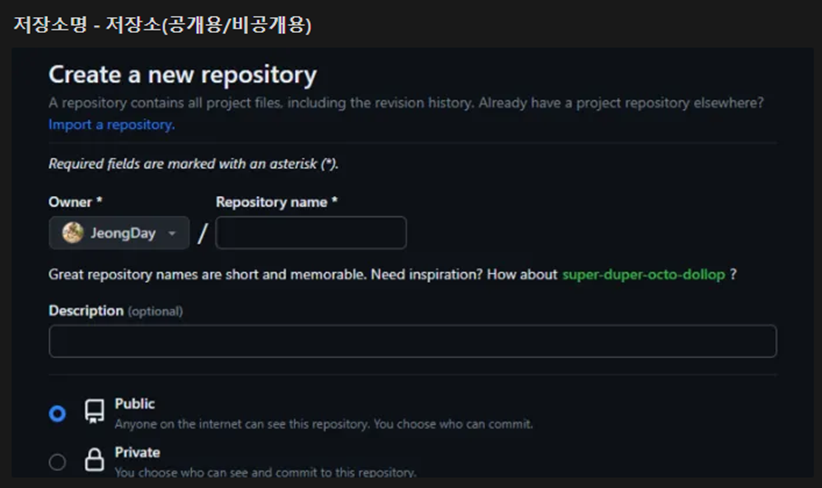
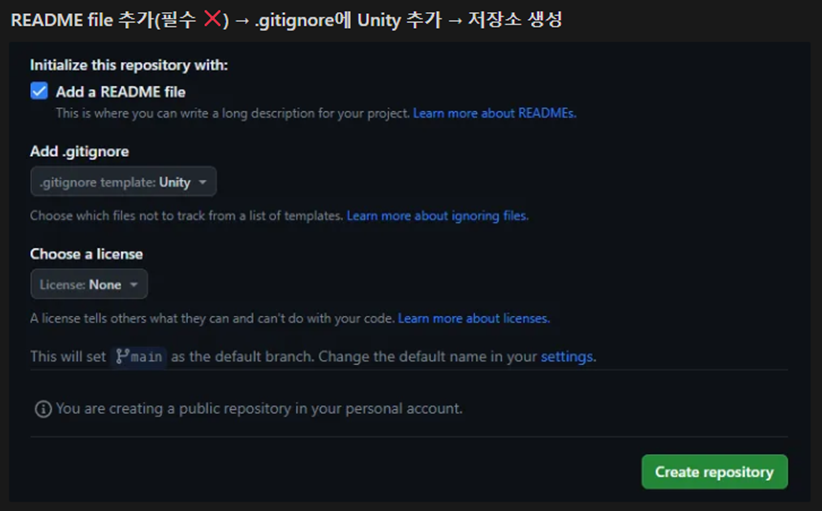
>> Repository 생성
>> GitHub Desktop
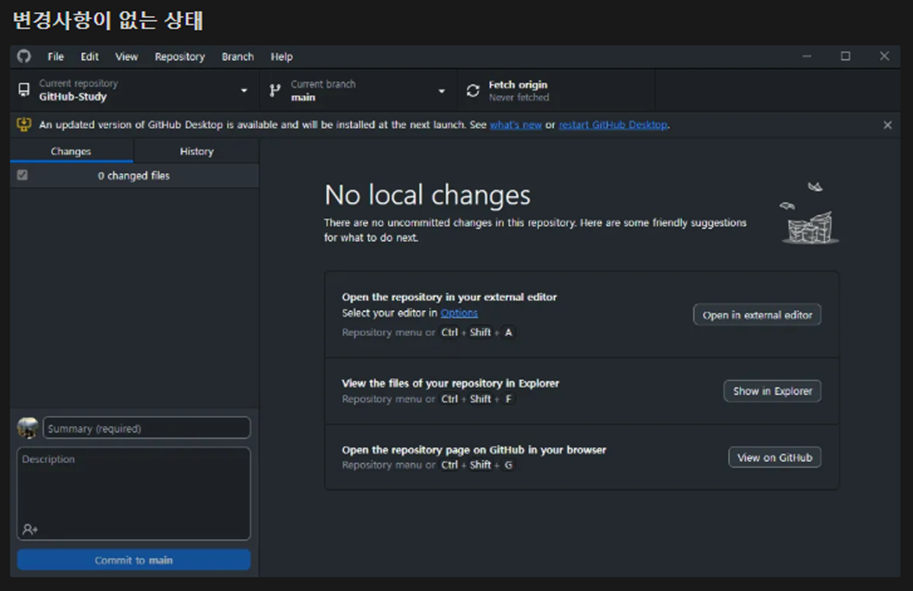
>> Commit
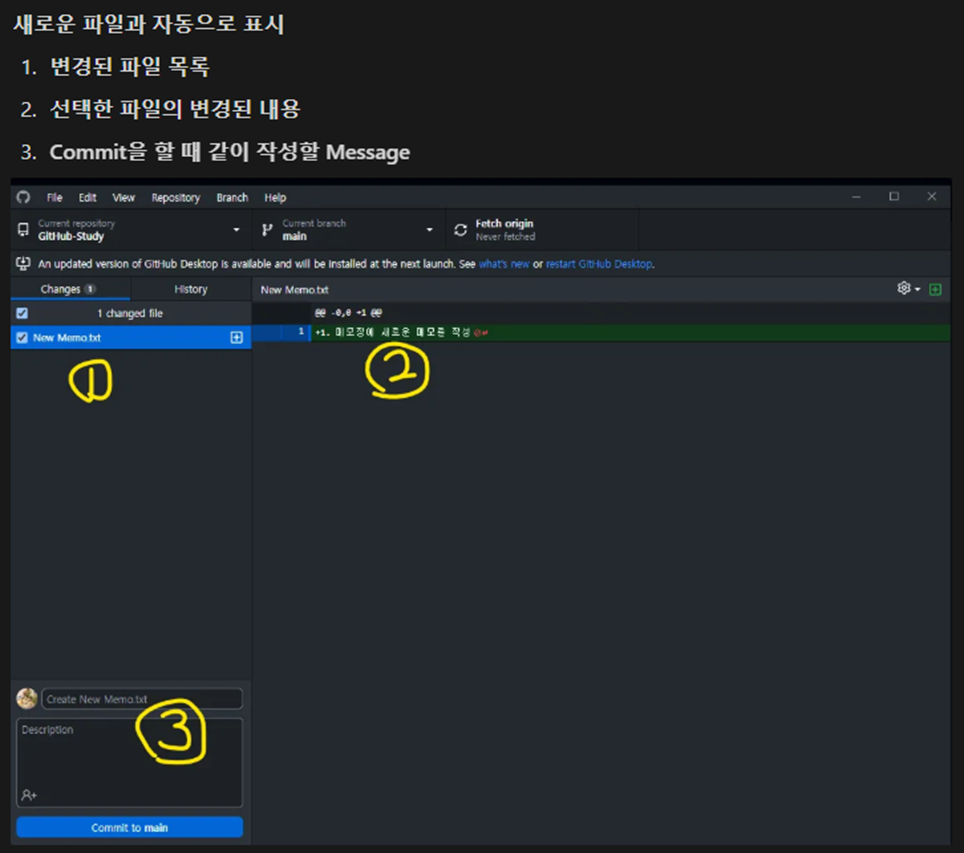
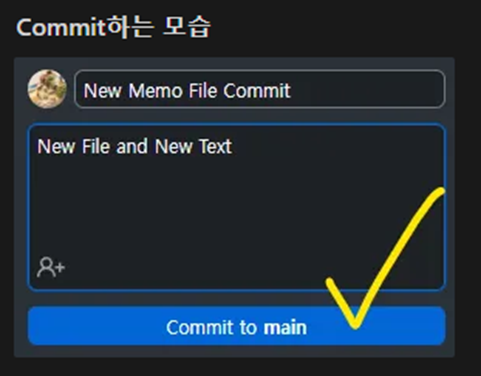
- 제목 : 간결하고 요약적인 작업 내용
- 본문 : 변경된 내용을 더 자세히 설명
- 태그 : [기능], [버그], [리팩터링], [문서], [테스트] 등
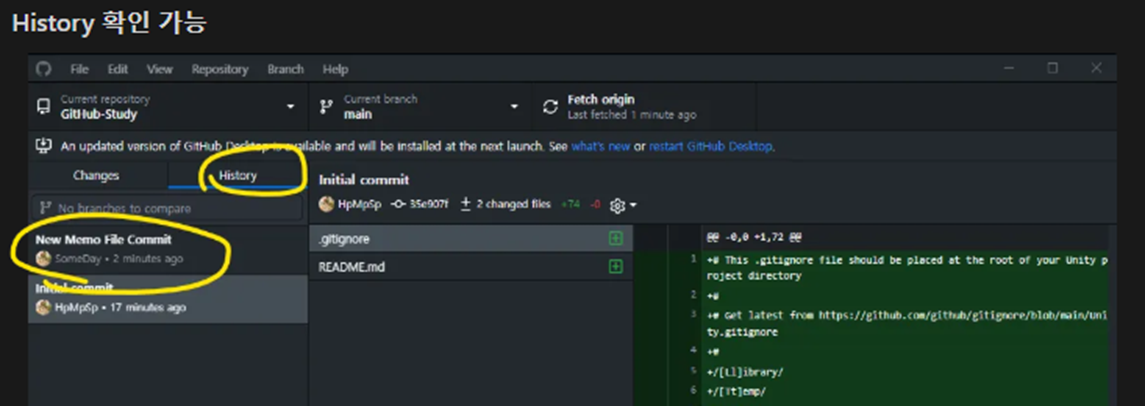
※ Push하기 전, History에서 Commit한 내역들 확인 및 수정 가능
- Amend commit : 커밋 수정 --> 간단히 메세지 수정이라 생각하면 된다.
- Undo commit : 커밋 취소 --> 커밋을 아예 취소해버린다.
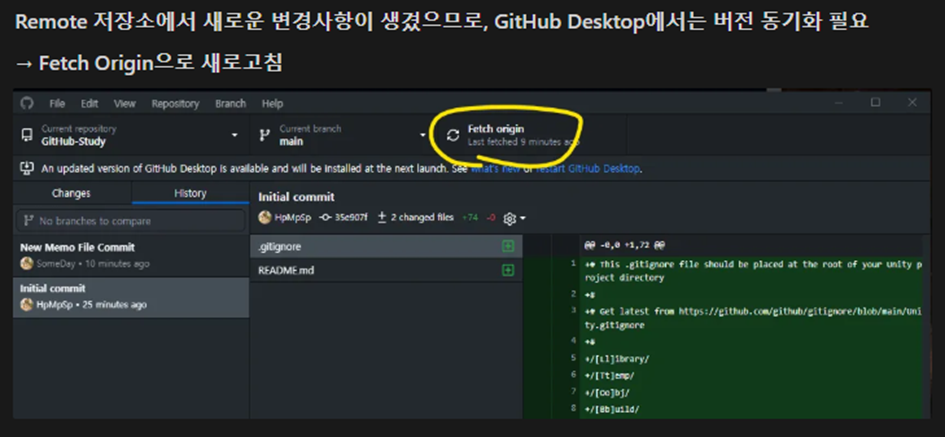
>> Push

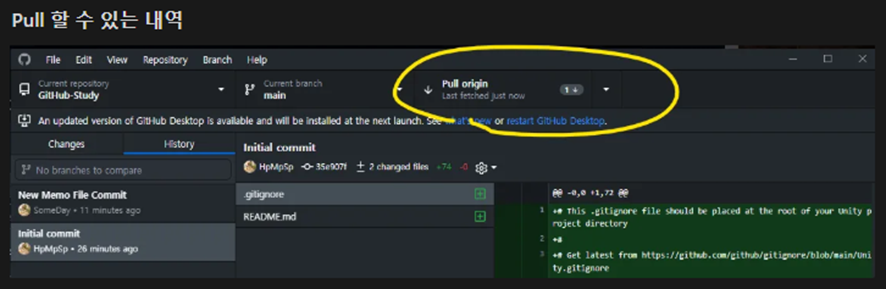
>> Pull
>> Unity Project와 연결
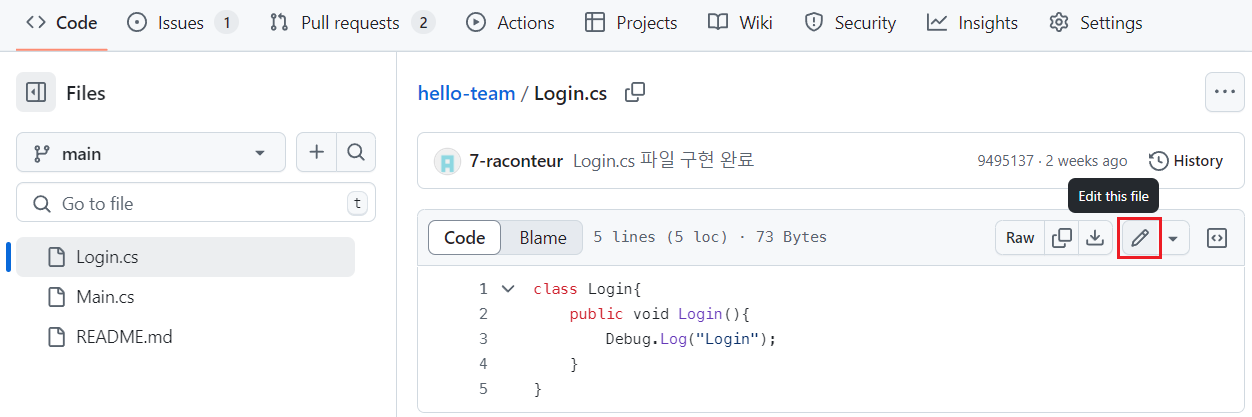
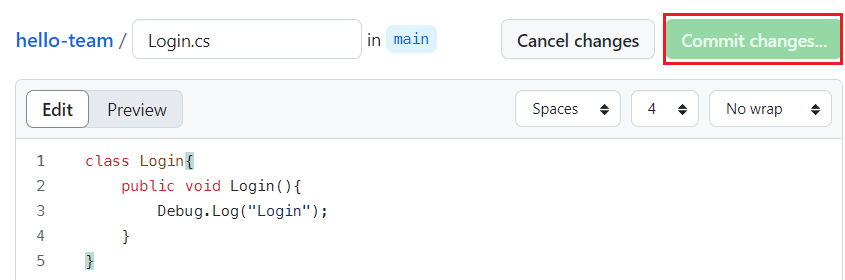
※ 급하게 또는 간단하게 코드를 수정해야하는 경우
: GitHub 홈페이지에서 수정 가능하다
└ Git Branch 관리
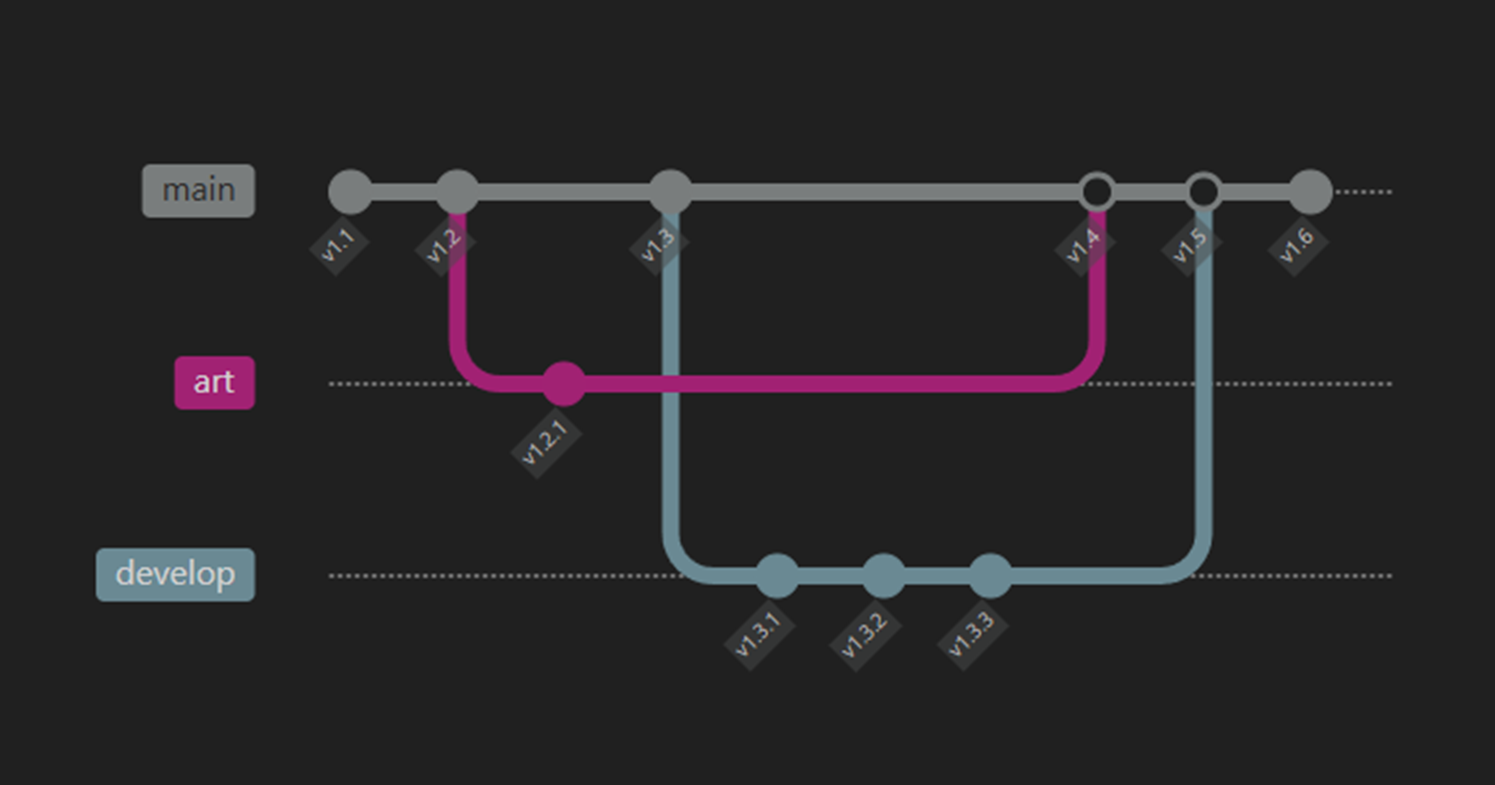
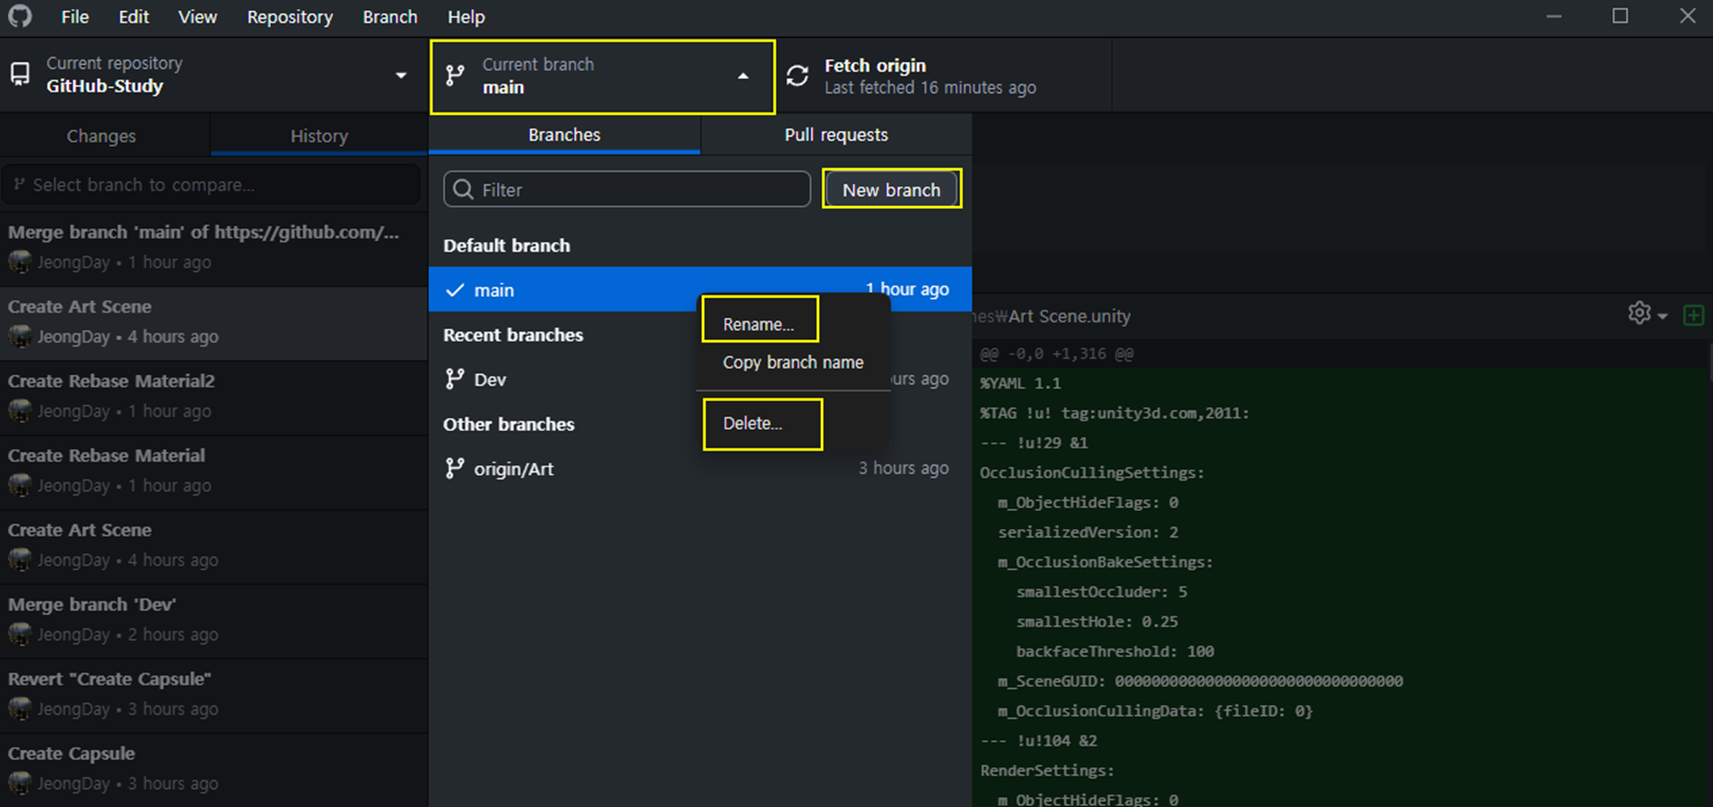
>> Git Branch 생성 / 변경 / 삭제
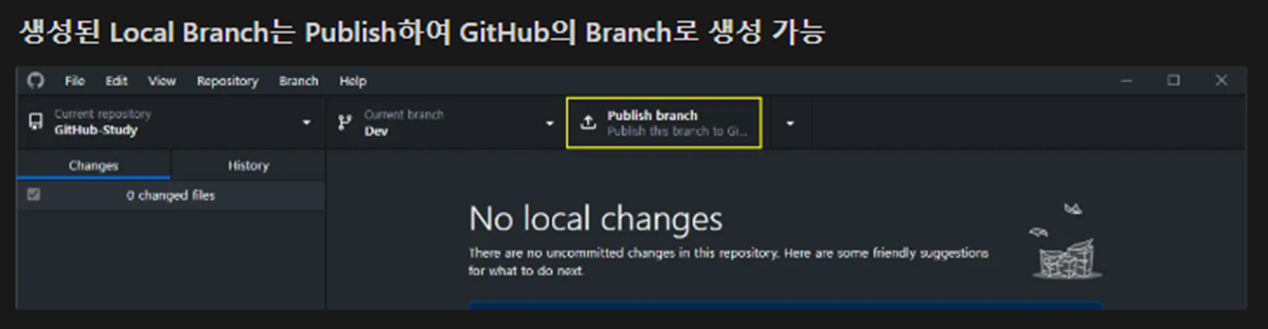
>> Branch Publish
>> Branch 수정 / 취소 / 이동
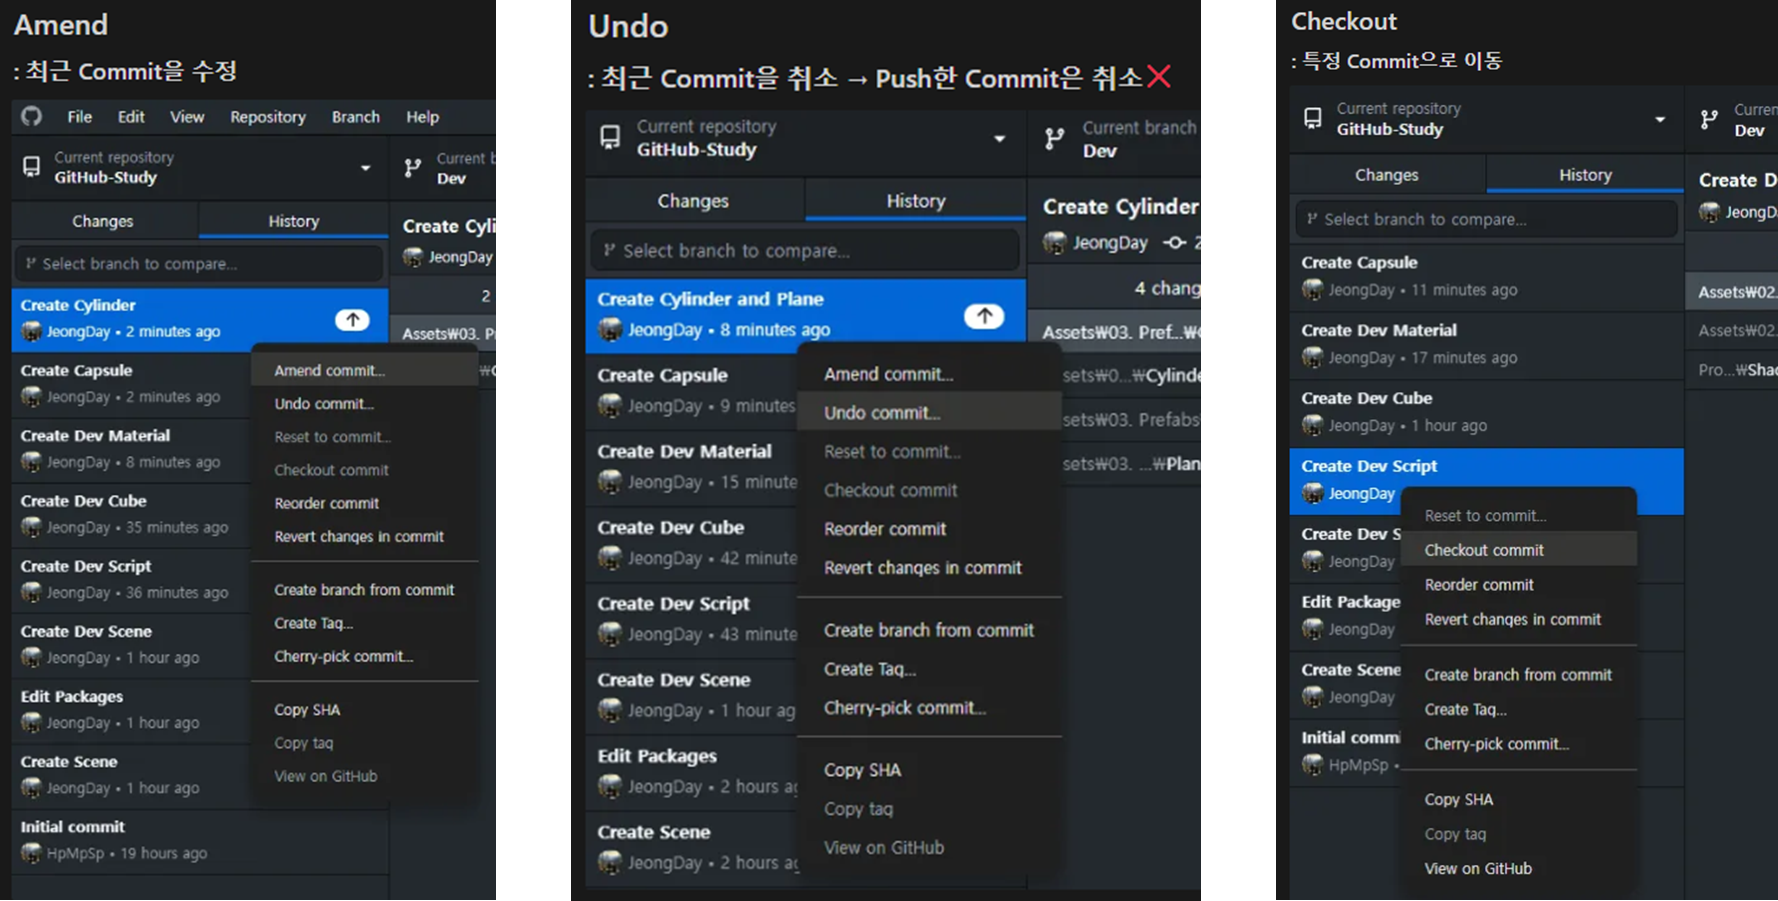
--> Checkout은 과거로 잠깐 이동하는 것 (진짜 이동하는 것이 아님)
>> Git 되돌리기 (Revert / Reset)
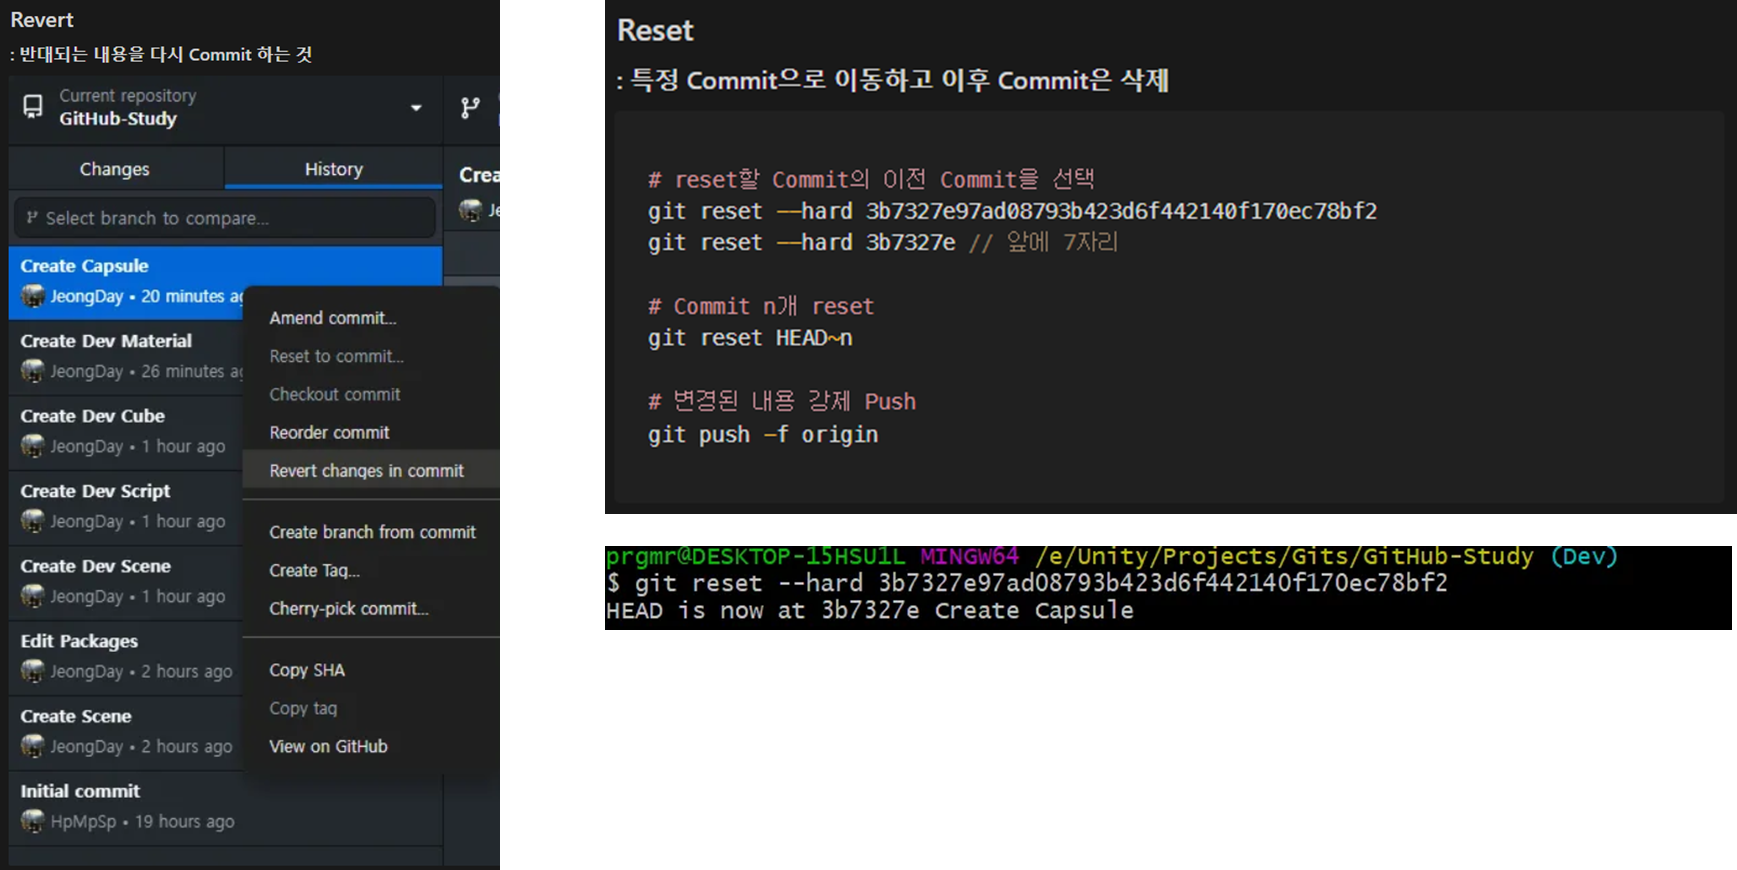
--> Reset은 Github Desktop에서 불가능, Git Bash에서 해야한다.
※ Revert를 할 때는 최근에 한 Commit부터 순차적으로 해야 에러가 나지 않는다.
--> 순차적으로 하지 않는다면 정말 이전의 다른 Commit과 연관이 없어야 한다. (그렇지만 순차적으로 하는 것을 추천)
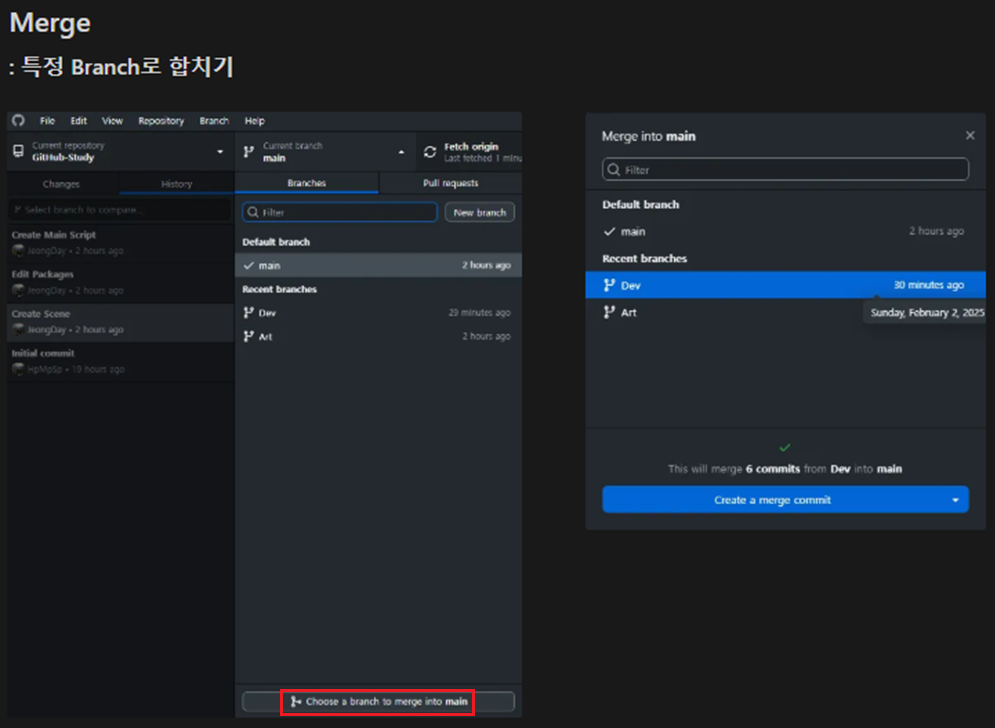
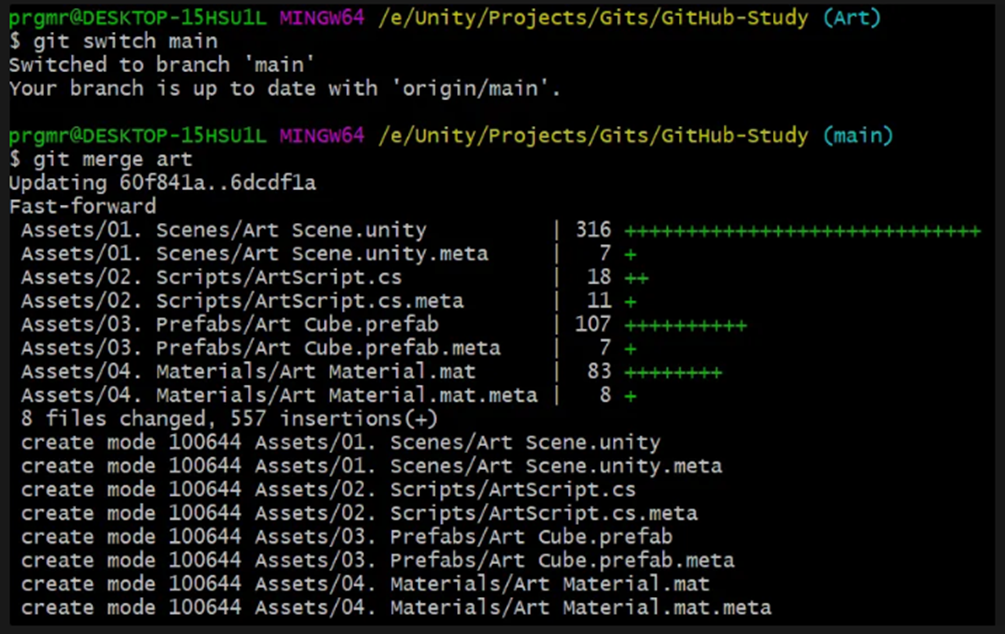
>> Git 합치기 (Merge / Rebase)
: 합치기 vs 흡수

'Development > C#' 카테고리의 다른 글
| 멋쟁이사자처럼부트캠프 Unity 게임 개발 3기 48일차 (0) | 2025.02.05 |
|---|---|
| 멋쟁이사자처럼부트캠프 Unity 게임 개발 3기 47일차 (1) | 2025.02.04 |
| 멋쟁이사자처럼부트캠프 Unity 게임 개발 3기 45일차 (0) | 2025.01.24 |
| 멋쟁이사자처럼부트캠프 Unity 게임 개발 3기 44일차 (0) | 2025.01.23 |
| 멋쟁이사자처럼부트캠프 Unity 게임 개발 3기 43일차 (0) | 2025.01.22 |


