목차
2D 게임 맛보기
우선 'Universal 2D'로 새 Project를 만든다.

이후, 받은 Asset 4개를 Import 해준다.
>> .unitypackage 파일은 그냥 실행하면 설치되며, .psd 파일은 따로 드래그&드롭으로 Import
2D 캐릭터 Import
1. 2D Animation 할 캐릭터의 png를 준비
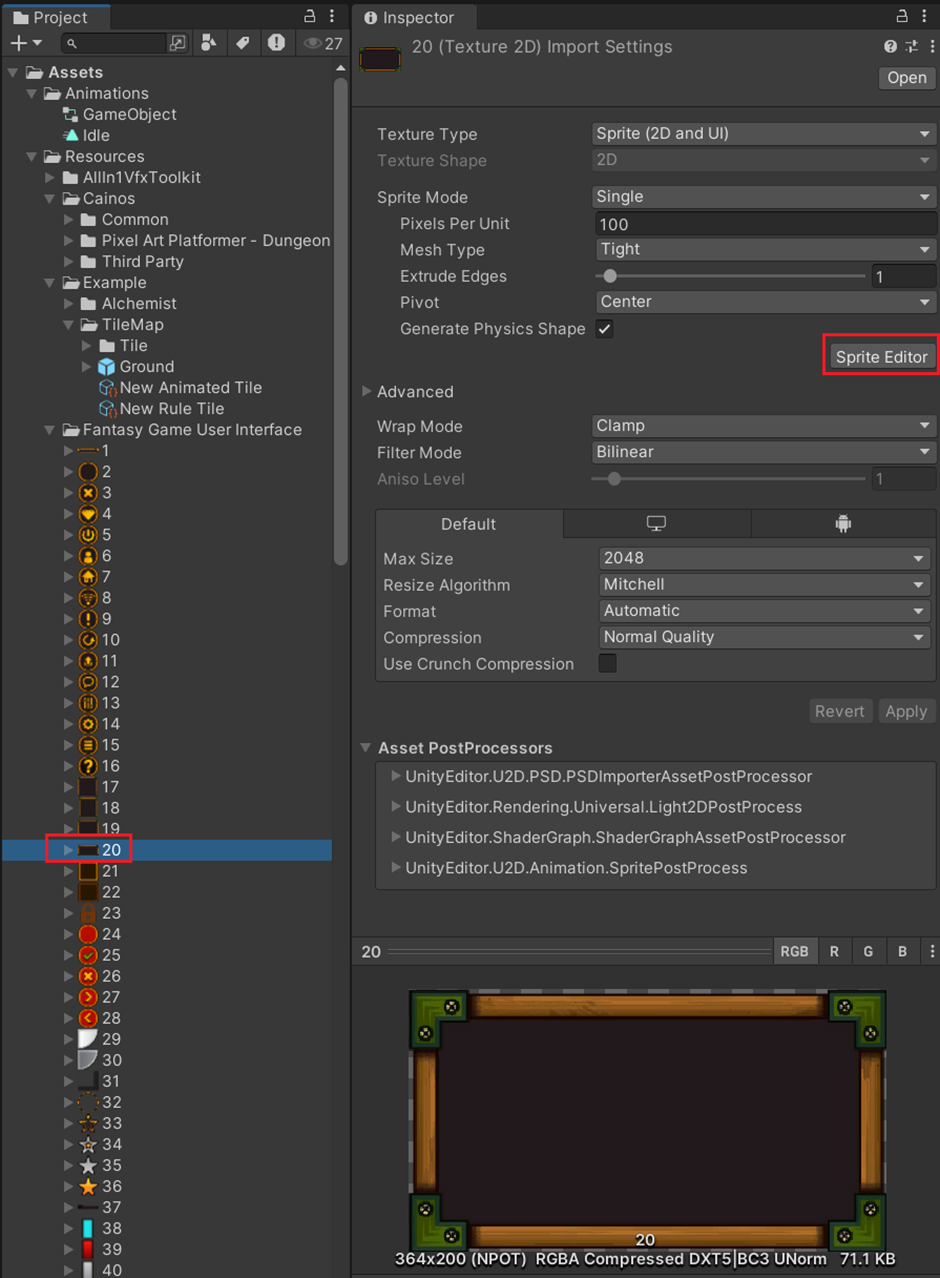
2. 준비한 캐릭터 Slice
>> 세부 설정 후, Sprite Editor 열기


※ 원래 Pivot은 Center였는데, 그렇게 하니 Rigidbody 2D를 적용했을 때 캐릭터가 붕 떠서 수정
3. 빈 게임 오브젝트 만들어서 Sprite Renderer, Animator 추가한 뒤, Slice한 캐릭터 바인딩

4. Animation 추가
>> Animation 열기 --> 단축키 : Ctrl + 6
>> Create로 Animation 생성 --> 넣고싶은 만큼 넣으면 그게 Animation 프레임이 된다. (0 ~ 13까지 추가)


>> Animation이 너무 빠르므로 조정
: Show Sample Rate를 켜서 1초당 재생할 Animation 프레임 수를 결정 (10으로 설정)

--> Animator의 'MyCharacter'를 더블클릭해서 Animation State 'MyIdle' 확인

5. Animator 설정
>> Import한 Animation들을 따로 복붙
>> Animator Controller 생성

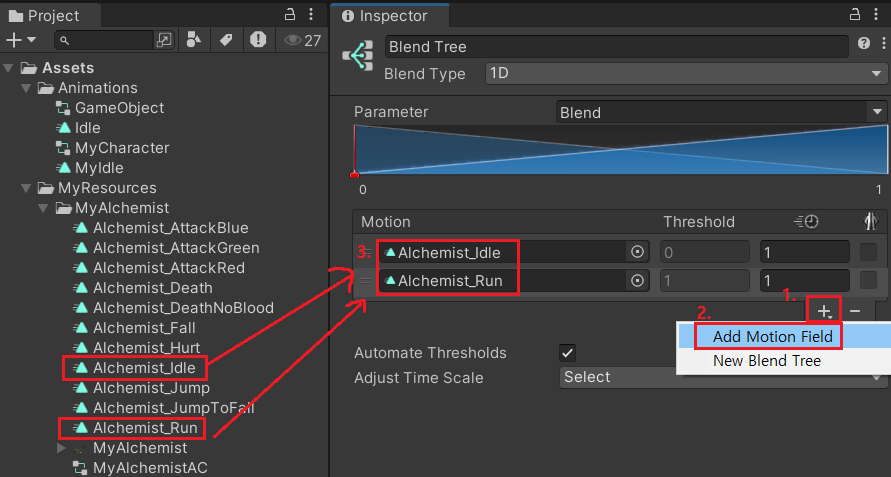
>> Animator에 New Blend Tree 생성
: Blend Tree의 Motion에 Idle과 Run Animation 넣기--> Parameters의 Blend를 Speed로 이름 변경
※ Blend Tree 이름도 Idles로 변경


>> 나머지 Animation들 추가하고 Make Transition으로 화살표 이어주기 --> 'Idles'가 Default State가 아니라면 세팅해주기

>> Character에 Rigidbody 2D와 Capsule Collider 2D 추가
: Freeze Rotation의 Z를 체크해서 앞으로 고꾸라지지 않도록 설정

└ Input System을 이용하여 캐릭터 Input 넣기
>> Package Manager에서 Packages를 Unity Registry로 바꾸고 'Input System'을 검색하여 Install
※ Project Settings의 Player에서 Active Input Handling이 'Both'인지 체크 --> Both로 돼있어야 기존의 Input과 추가한 Input System을 같이 사용 가능


>> Input Actions 생성


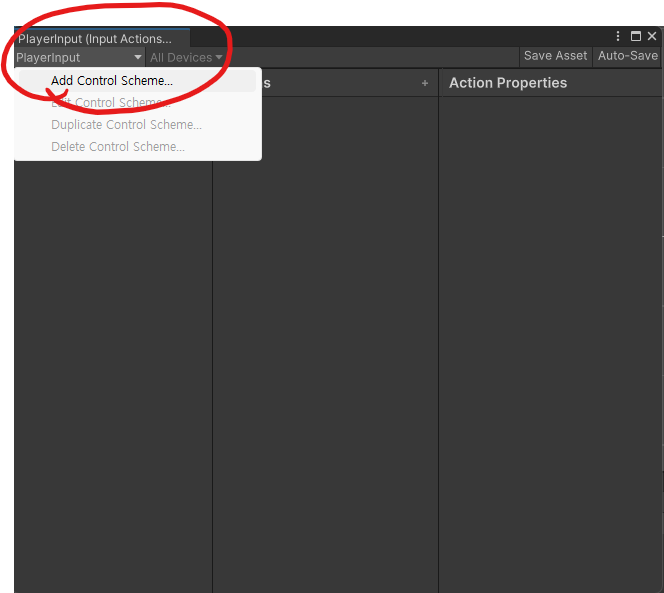
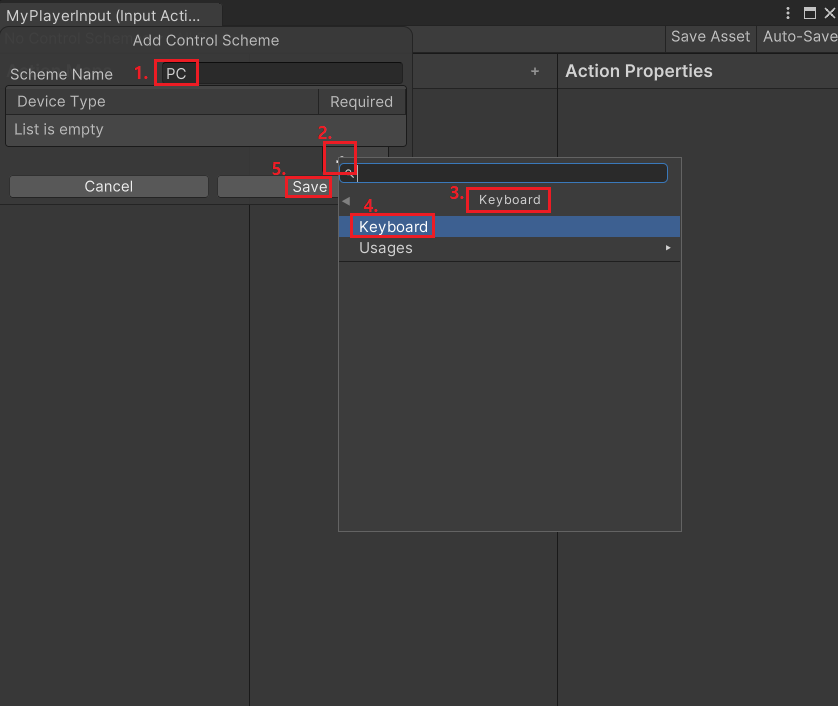


※ W, S, A, D 전부 PC에 체크하기
>> Character에 Player Input 추가 및 설정


>> Character에 Char Controller Script 생성 및 추가
: 코드 작성
using System.Collections;
using System.Collections.Generic;
using UnityEngine;
using UnityEngine.InputSystem; // InputAction 추가하면서 생성

public class MyCharController : MonoBehaviour
{
    private InputAction moveInput;

    void Start()
    {
        UnityEngine.InputSystem.PlayerInput input = GetComponent<UnityEngine.InputSystem.PlayerInput>();
        moveInput = input.actions["Move"]; // Input Actions에서 생성한 Actions와 동일한 이름
    }

    void Update()
    {
        Vector2 moveValue = moveInput.ReadValue<Vector2>();
        Debug.Log(moveValue);
    }
}
Tilemap
>> Tile Palette 생성

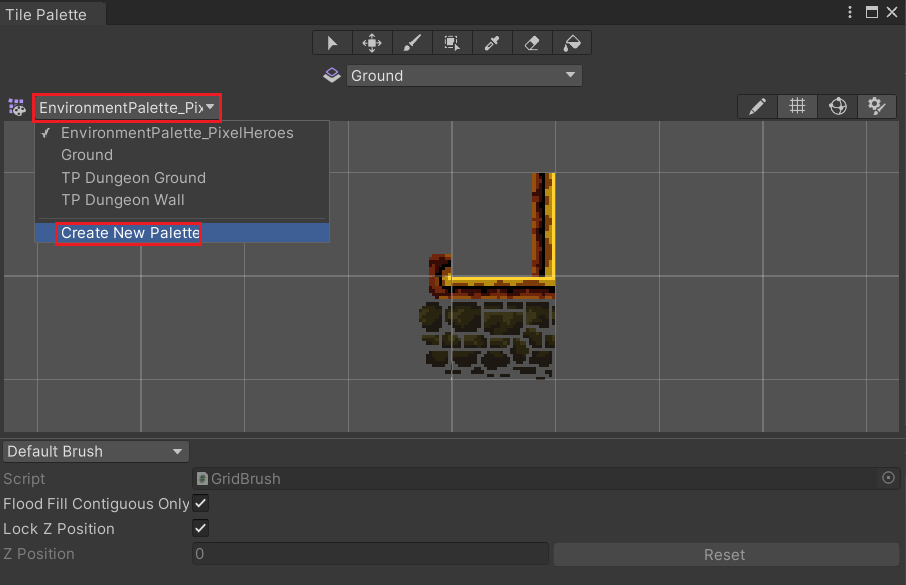

※ 이후 저장할 폴더 지정

※ 타일들을 담을 폴더를 따로 만들어서 지정
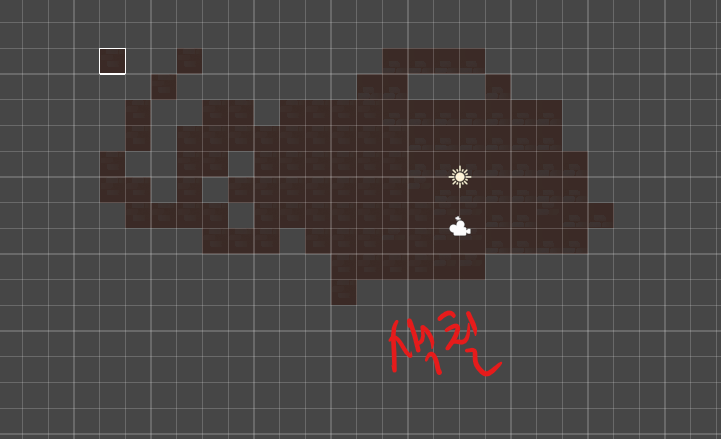
>> Hierarchy에 TileMap 추가 후 Tile 그리기

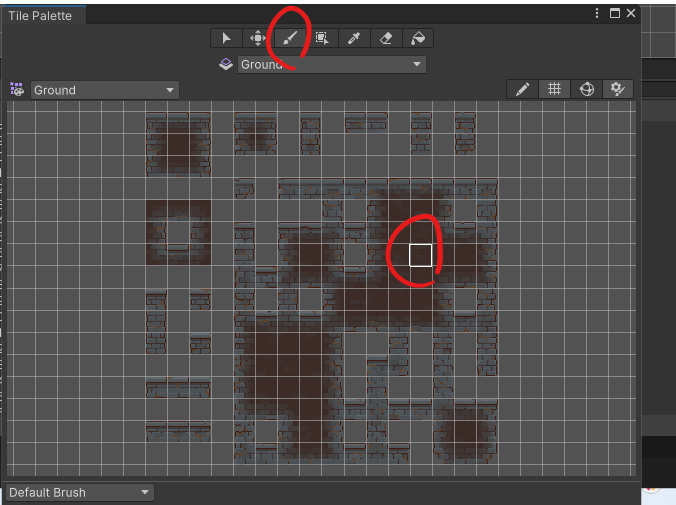
※ 사용된 타일 확인 방법

>> TileMap 세부 설정

>> 배치한 타일들 떨어지지 않도록 설정 --> 체크 해제
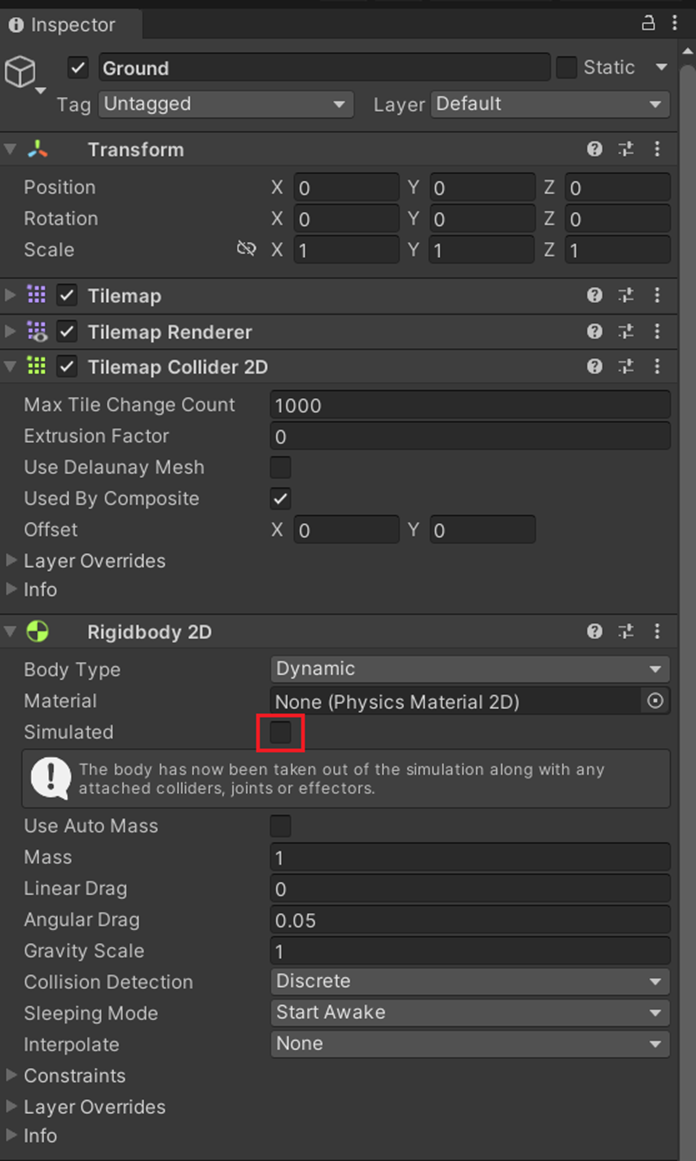
※ Tile 충돌 설정

- None : 충돌 X
- Sprite : Image의 Pixel 단위로 충돌
- Grid : Grid 단위로 충돌
>> Tiles

>> Animated Tile


>> Rule Tile
: 반복적으로 타일 배치를 해야할 때 유용하게 쓰임 --> 자세한 건 유튜브로 찾자..
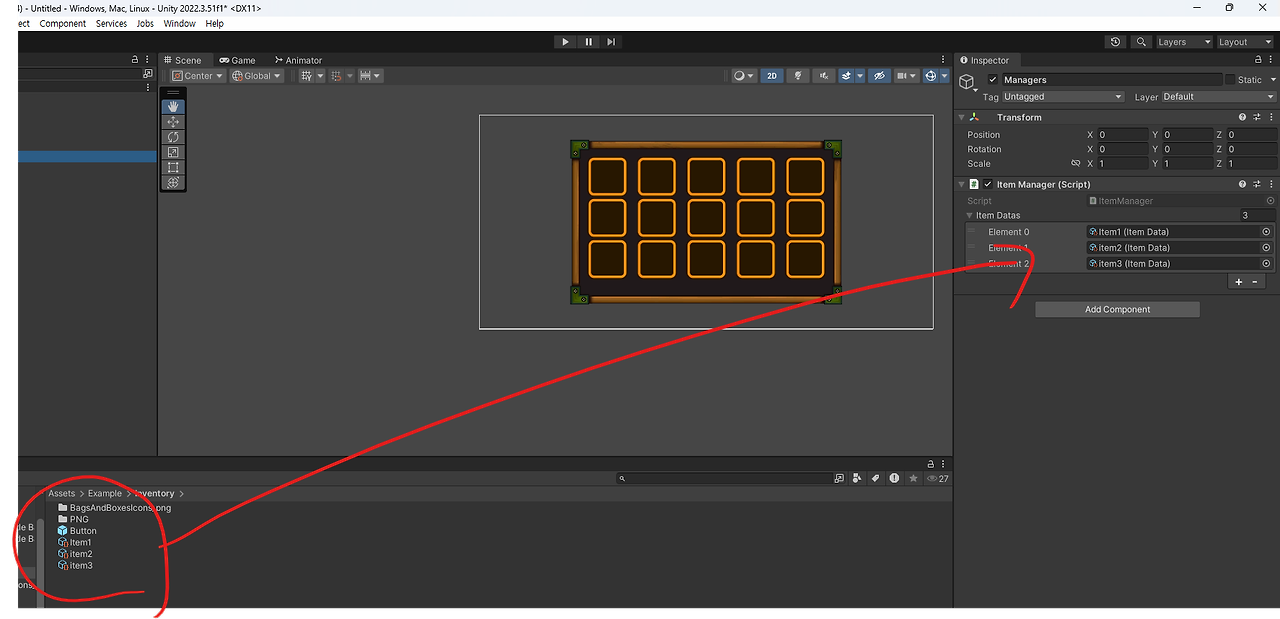
Inventory
※ 인벤토리 크기를 늘릴 때 Pixel이 안 무너지게 설정하기


--> 이렇게 설정한 뒤, Width와 Height 값을 늘리면 된다.
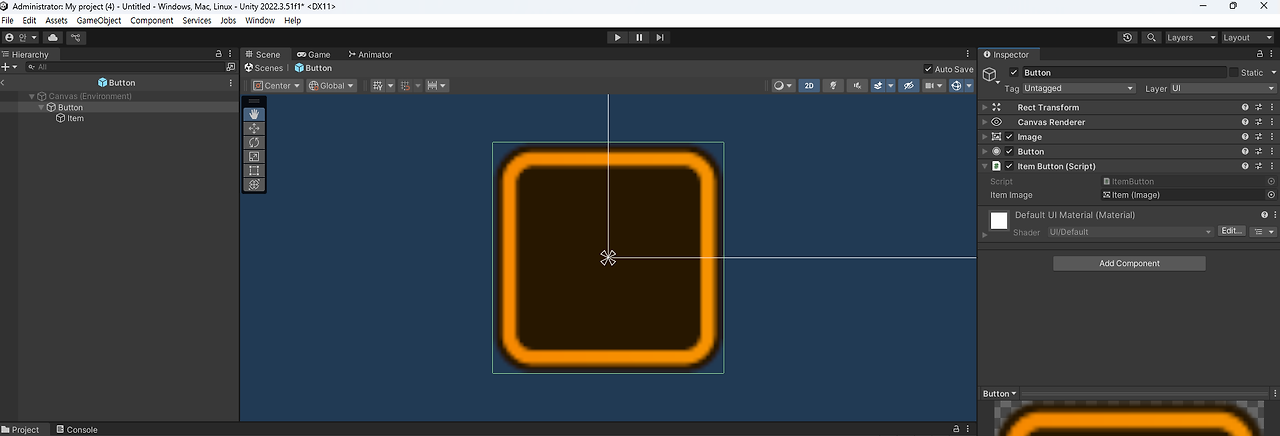
>> Inventory 칸 만들기


※ Button Prefab


>> Inventory.cs : Inventory에 할당
using System.Collections;
using System.Collections.Generic;
using UnityEngine;
using UnityEngine.UI;

public class Inventory : MonoBehaviour
{
    [SerializeField]GridLayoutGroup gridLayoutGroup;
    private ItemButton[] buttons;

    private int selectedItemIndex1 = -1;
    private int selectedItemIndex2 = -1;

    void Awake()
    {
        buttons = gridLayoutGroup.
            GetComponentsInChildren<ItemButton>();

        ItemManager itemManager = FindObjectOfType<ItemManager>();
        for (var i = 0; i < buttons.Length; i++)
        {
            var itemData = itemManager.itemDatas[Random.Range(0, itemManager.itemDatas.Count)];

            var i1 = i;
            buttons[i].GetComponent<Button>().
                onClick.AddListener(() =>
                    OnClickItemButton(i1)
                    );

            buttons[i].GetComponent<ItemButton>().ItemInfo = new ItemInfo()
            {
                amount = 1,
                itemData = itemData
            };
        }
    }

    void OnClickItemButton(int index)
    {
        if (0 > selectedItemIndex1)
        {
            selectedItemIndex1 = index;
        }
        else if (0 > selectedItemIndex2)
        {
            selectedItemIndex2 = index;

            var itemInfo1 = buttons[selectedItemIndex1].ItemInfo;
            var itemInfo2 = buttons[selectedItemIndex2].ItemInfo;
            buttons[selectedItemIndex1].ItemInfo = itemInfo2;
            buttons[selectedItemIndex2].ItemInfo = itemInfo1;
            selectedItemIndex1 = -1;
            selectedItemIndex2 = -1;
        }
    }
}
※ 'var i1 = i' 로 설정하고 i1을 넣는 이유
: 이 코드에서는 인벤토리가 실행될 때 for문을 돌면서 i값이 변경된다. 그런데 클로저를 이용하지 않고 i를 직접 참조하면 이미 for을 모두 돌아서 15가 된 i를 계속 참조하게 된다. 하지만 for문 내부에서 지역 변수를 하나 만들어서 클로저를 만들어주면 메모리에 새로운 공간이 할당됩니다. 그래서 같은 이름의 변수명인데도 다른 메모리 공간에 저장돼서 각각 올바른 인덱스 번호를 기억할 수 있게 된다. --> '클로저'
※ AddListener() 한 다음 함수 집어넣으면, 해당하는 버튼에 OnClick 시 실행하는 함수가 들어가게 된다.
>> ItemButton.cs : Button Prefab에 할당
using System.Collections;
using System.Collections.Generic;
using UnityEngine;
using UnityEngine.UI;

public class ItemButton : MonoBehaviour
{
    private ItemInfo itemInfo;
    public ItemInfo ItemInfo
    {
        get => itemInfo;
        set
        {
            itemInfo = value;
            SetItemImage(itemInfo.itemData.icon);
        }
    }

    [SerializeField]Image itemImage;

    void SetItemImage(Sprite sprite)
    {
        itemImage.sprite = sprite;
        if (sprite == null)
        {
            var color = itemImage.color;
            color.a = 0;
            itemImage.color = color;
        }
        else
        {
            var color = itemImage.color;
            color.a = 1.0f;
            itemImage.color = color;
        }
    }
}
>> ItemManager.cs
using System;
using System.Collections;
using System.Collections.Generic;
using UnityEngine;

[CreateAssetMenu(fileName = "ItemData", menuName = "Datas/ItemData")]
public class ItemData : ScriptableObject
{
    public string itemName;
    public Sprite icon;
}

public class ItemInfo
{
    public ItemData itemData;
    public int amount;
}

public class ItemManager : MonoBehaviour
{
    public List<ItemData> itemDatas = new List<ItemData>();
}
: 만든 ScriptableObject 만들기

2D Game Project Start
>> CharController.cs
using System;
using System.Collections;
using System.Collections.Generic;
using UnityEngine;
using UnityEngine.InputSystem;

public class CharController : MonoBehaviour
{
    private static readonly int Speed1 = Animator.StringToHash("Speed");
    [SerializeField] private float Speed = 5.0f;
    [SerializeField] private Camera _mainCamera;
    [SerializeField] private float CameraSpeed = 4.0f;
    [SerializeField] private float MaxDistence = 4.0f;

    private Vector3 cameraOffset;

    InputAction Move_Input;
    private Animator _animator;
    private Rigidbody2D _rigidbody;
    private SpriteRenderer _spriteRenderer;

    void Start()
    {
        _animator = GetComponent<Animator>();
        _rigidbody = GetComponent<Rigidbody2D>();
        _spriteRenderer = GetComponent<SpriteRenderer>();

        UnityEngine.InputSystem.PlayerInput Input = GetComponent<UnityEngine.InputSystem.PlayerInput>();
        Move_Input = Input.actions["Move"];

        cameraOffset = _mainCamera.transform.position - transform.position;
    }

    void Update()
    {
        Vector2 moveValue = Move_Input.ReadValue<Vector2>();

        if (moveValue.x != 0)
            _spriteRenderer.flipX = moveValue.x < 0;

        _animator.SetFloat(Speed1, Mathf.Abs(moveValue.x));
        transform.position += new Vector3(moveValue.x * Speed, 0, 0)  * Time.deltaTime;
    }

    private void LateUpdate()
    {
        var CharPosition = transform.position + cameraOffset;
        float speed = CameraSpeed;

        Vector3 newPosition = Vector3.MoveTowards(_mainCamera.transform.position,
            CharPosition,
            speed * Time.deltaTime);

        _mainCamera.transform.position = newPosition;
    }
}
※ 맵 탐사용 임시 점프 코드
if (Input.GetKeyDown(KeyCode.Space))
	_rigidbody.AddForce(Vector2.up * 10f, ForceMode2D.Impulse);
>> 캐릭터의 방향을 전환하는 세 가지 방법
- Rotation Y를 -180으로 설정
- Scale X를 -1로 설정
- Flip을 체크
※ 카메라 떨림 해결 방법 유튜브
https://youtu.be/Zcuu8RBMBFc?si=2qsn20o0LxvY0xXI
>> Quest
: 카메라 거리 제한 만들어보기
>> Quest2
: A Pathfinding 공부하기
'Development > Unity BootCamp' 카테고리의 다른 글
| 멋쟁이사자처럼부트캠프 Unity 게임 개발 3기 27일차 (0) | 2024.12.27 |
|---|---|
| 멋쟁이사자처럼부트캠프 Unity 게임 개발 3기 26일차 (0) | 2024.12.26 |
| [멋쟁이사자처럼 부트캠프 TIL 회고] Unity 게임 개발 3기 17일차 (1) | 2024.12.13 |
| [멋쟁이사자처럼 부트캠프 TIL 회고] Unity 게임 개발 3기 16일차 (0) | 2024.12.11 |
| [멋쟁이사자처럼 부트캠프 TIL 회고] Unity 게임 개발 3기 15일차 (2) | 2024.12.10 |


